How to Add a Welcome Video to Your Course
At Xperiencify, we encourage the use of a "Welcome Video" or "Orientation Video" that students will see as soon as they purchase your course and are taken straight to the Dashboard.
First thing they'll see is a large welcome headline, along with some text that explains the big "Why" behind why they're even there in the first place!
Having this "Big Why"- along with an orientation video -- is your chance to start on the right foot. It's a highly effective way to welcome new customers & students, get them excited about the result that they just committed to, and give them any important introduction information about the Course.
When you refocus your student on the big Why, you can powerfully re-enroll them into taking action right away.
Adding Your Welcome Video
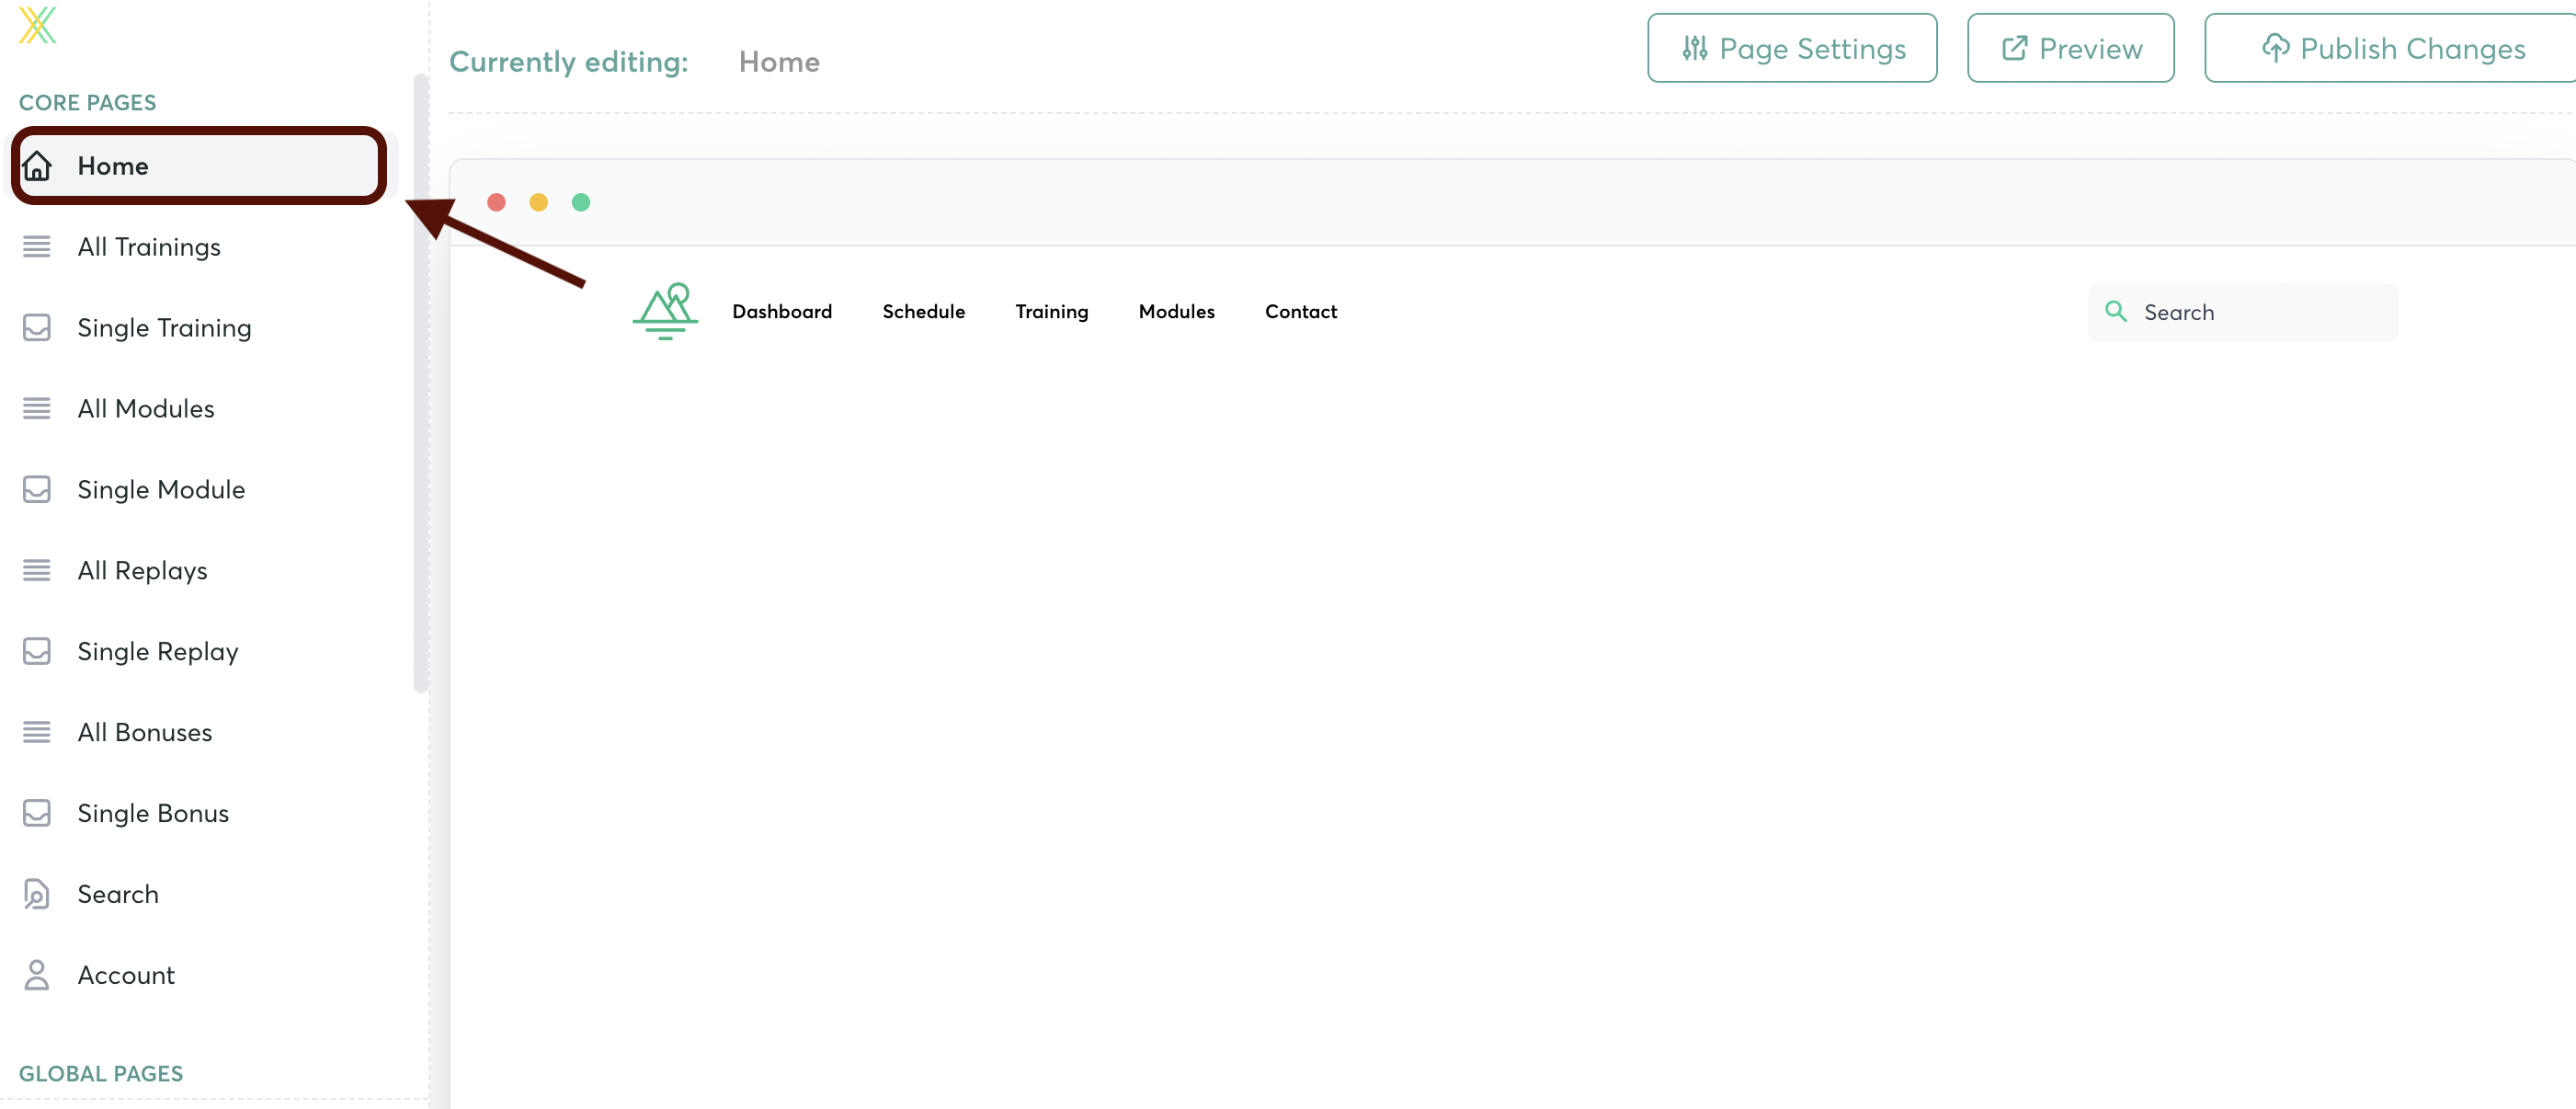
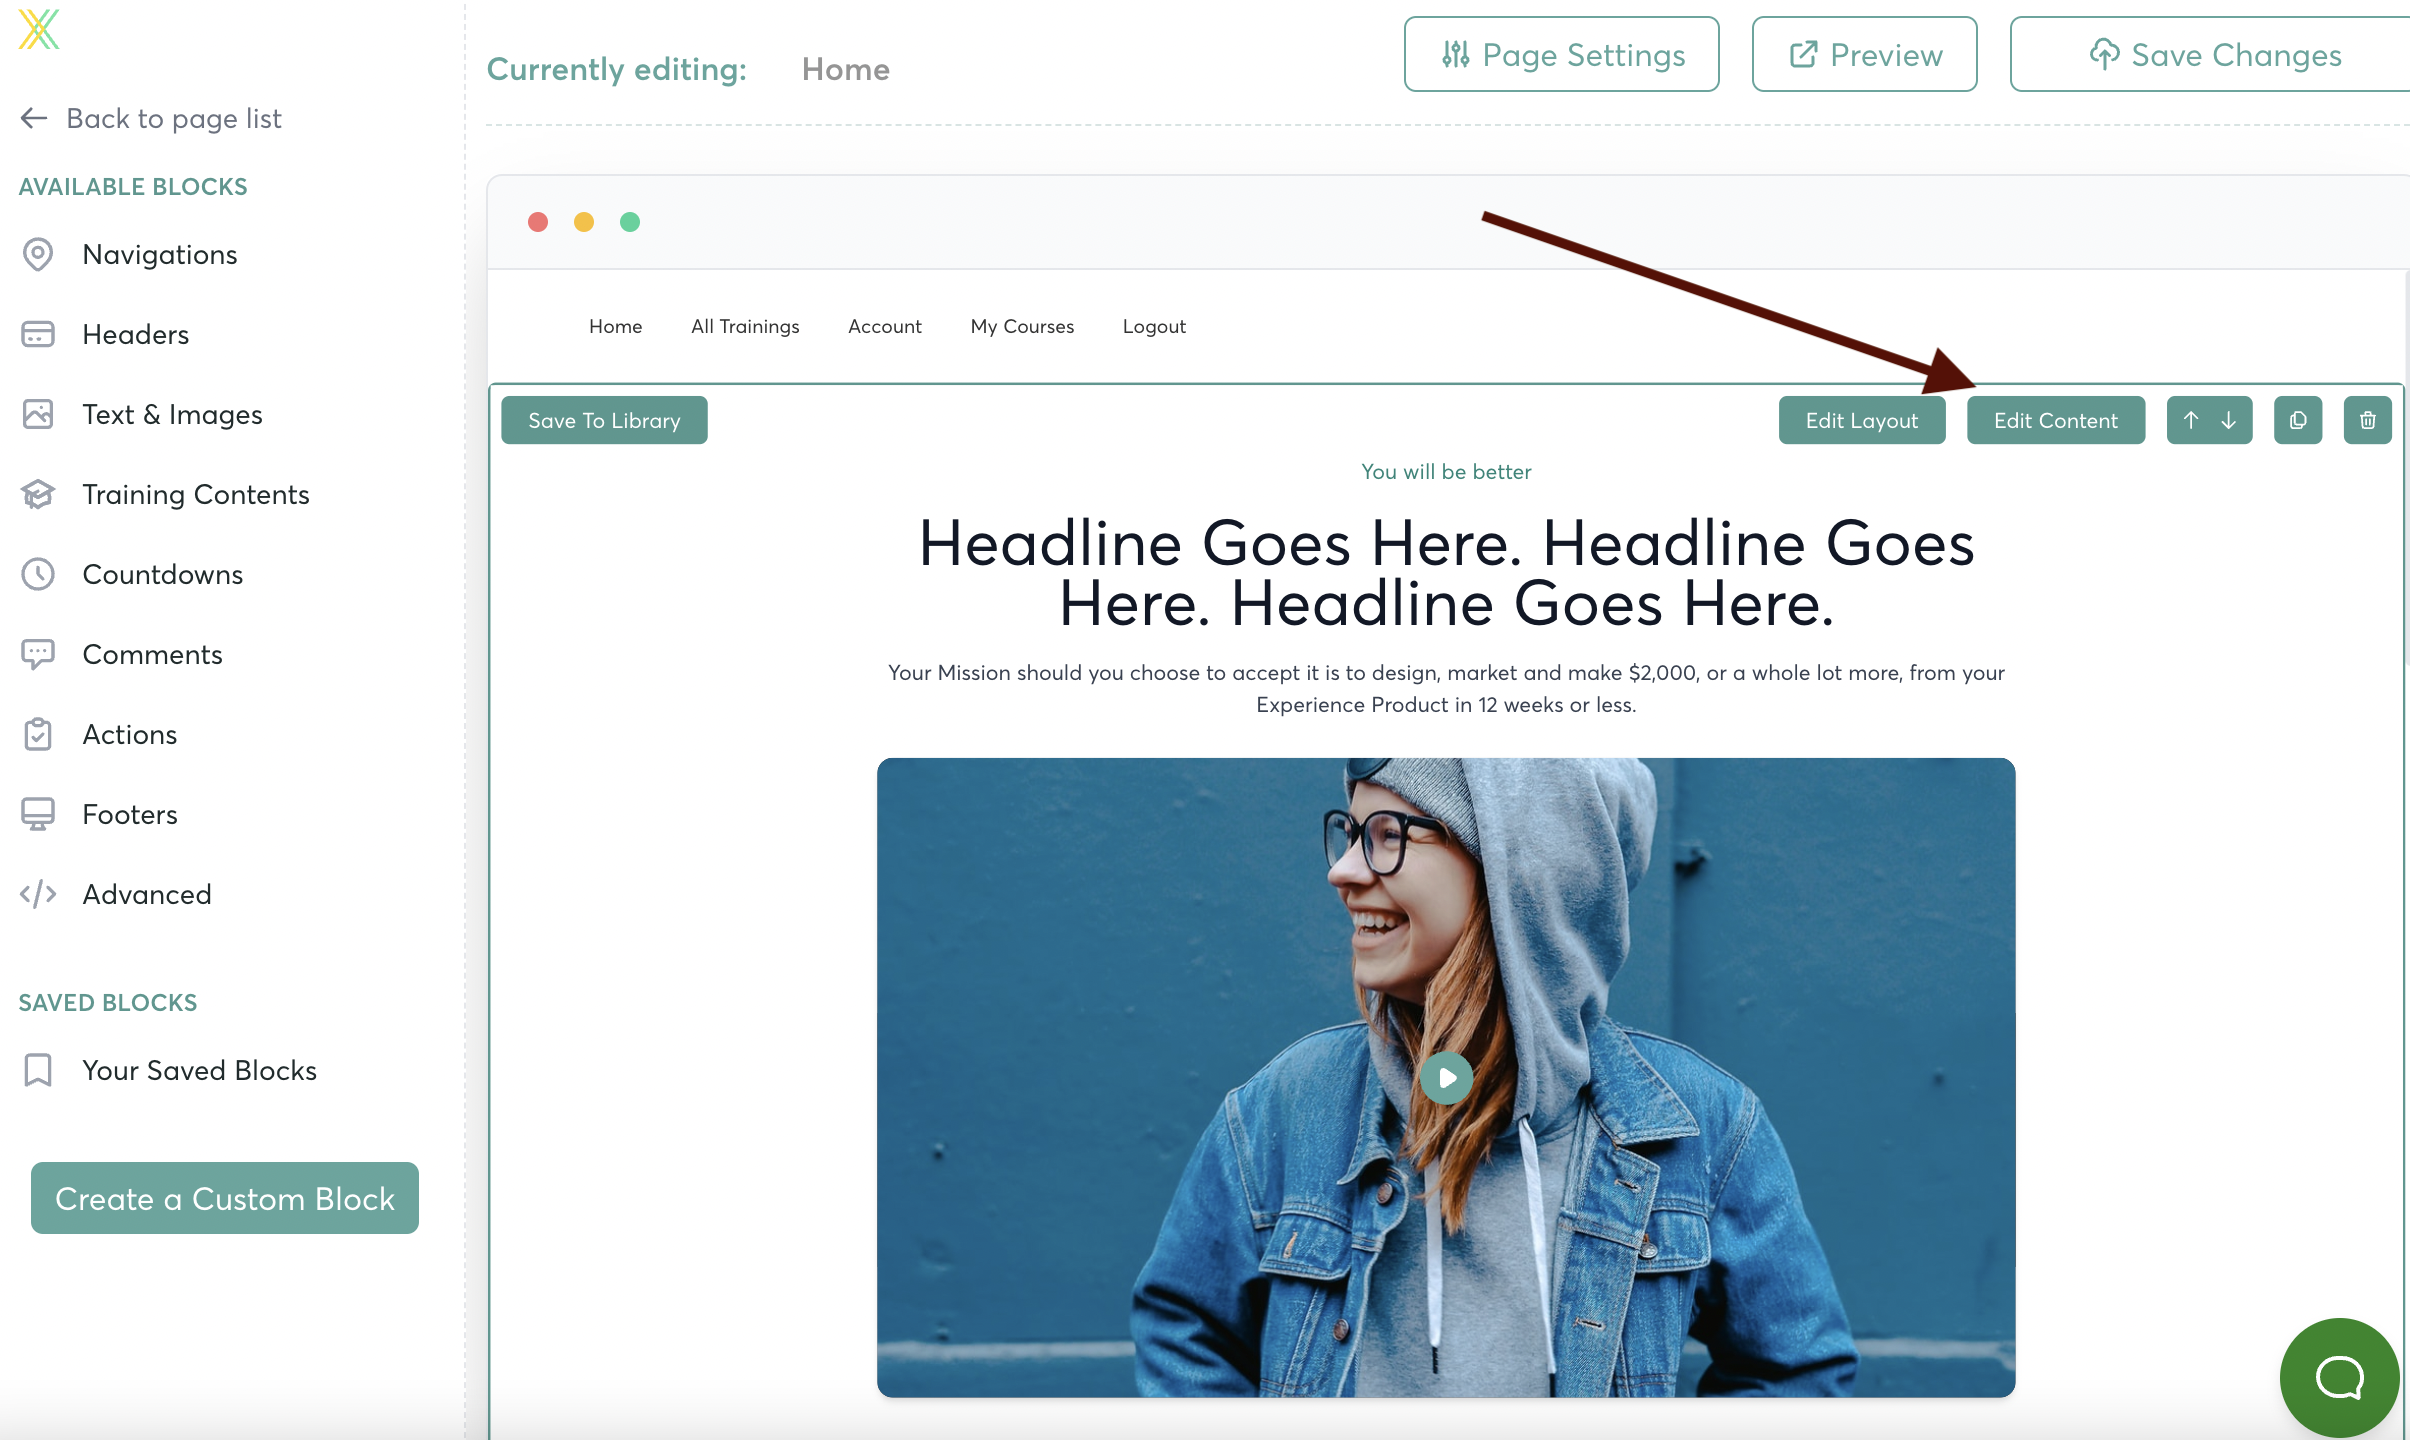
Inside Step 4 of your Course Builder, navigate to the Home Page and click on it to edit.
Your Course comes with a default Block where you can add the Welcome Video. First, click on this block to Edit:

or, if you accidentally delete that block, no worries. Navigate to "Headers". Scroll down the selections, and select this Block, with the video:
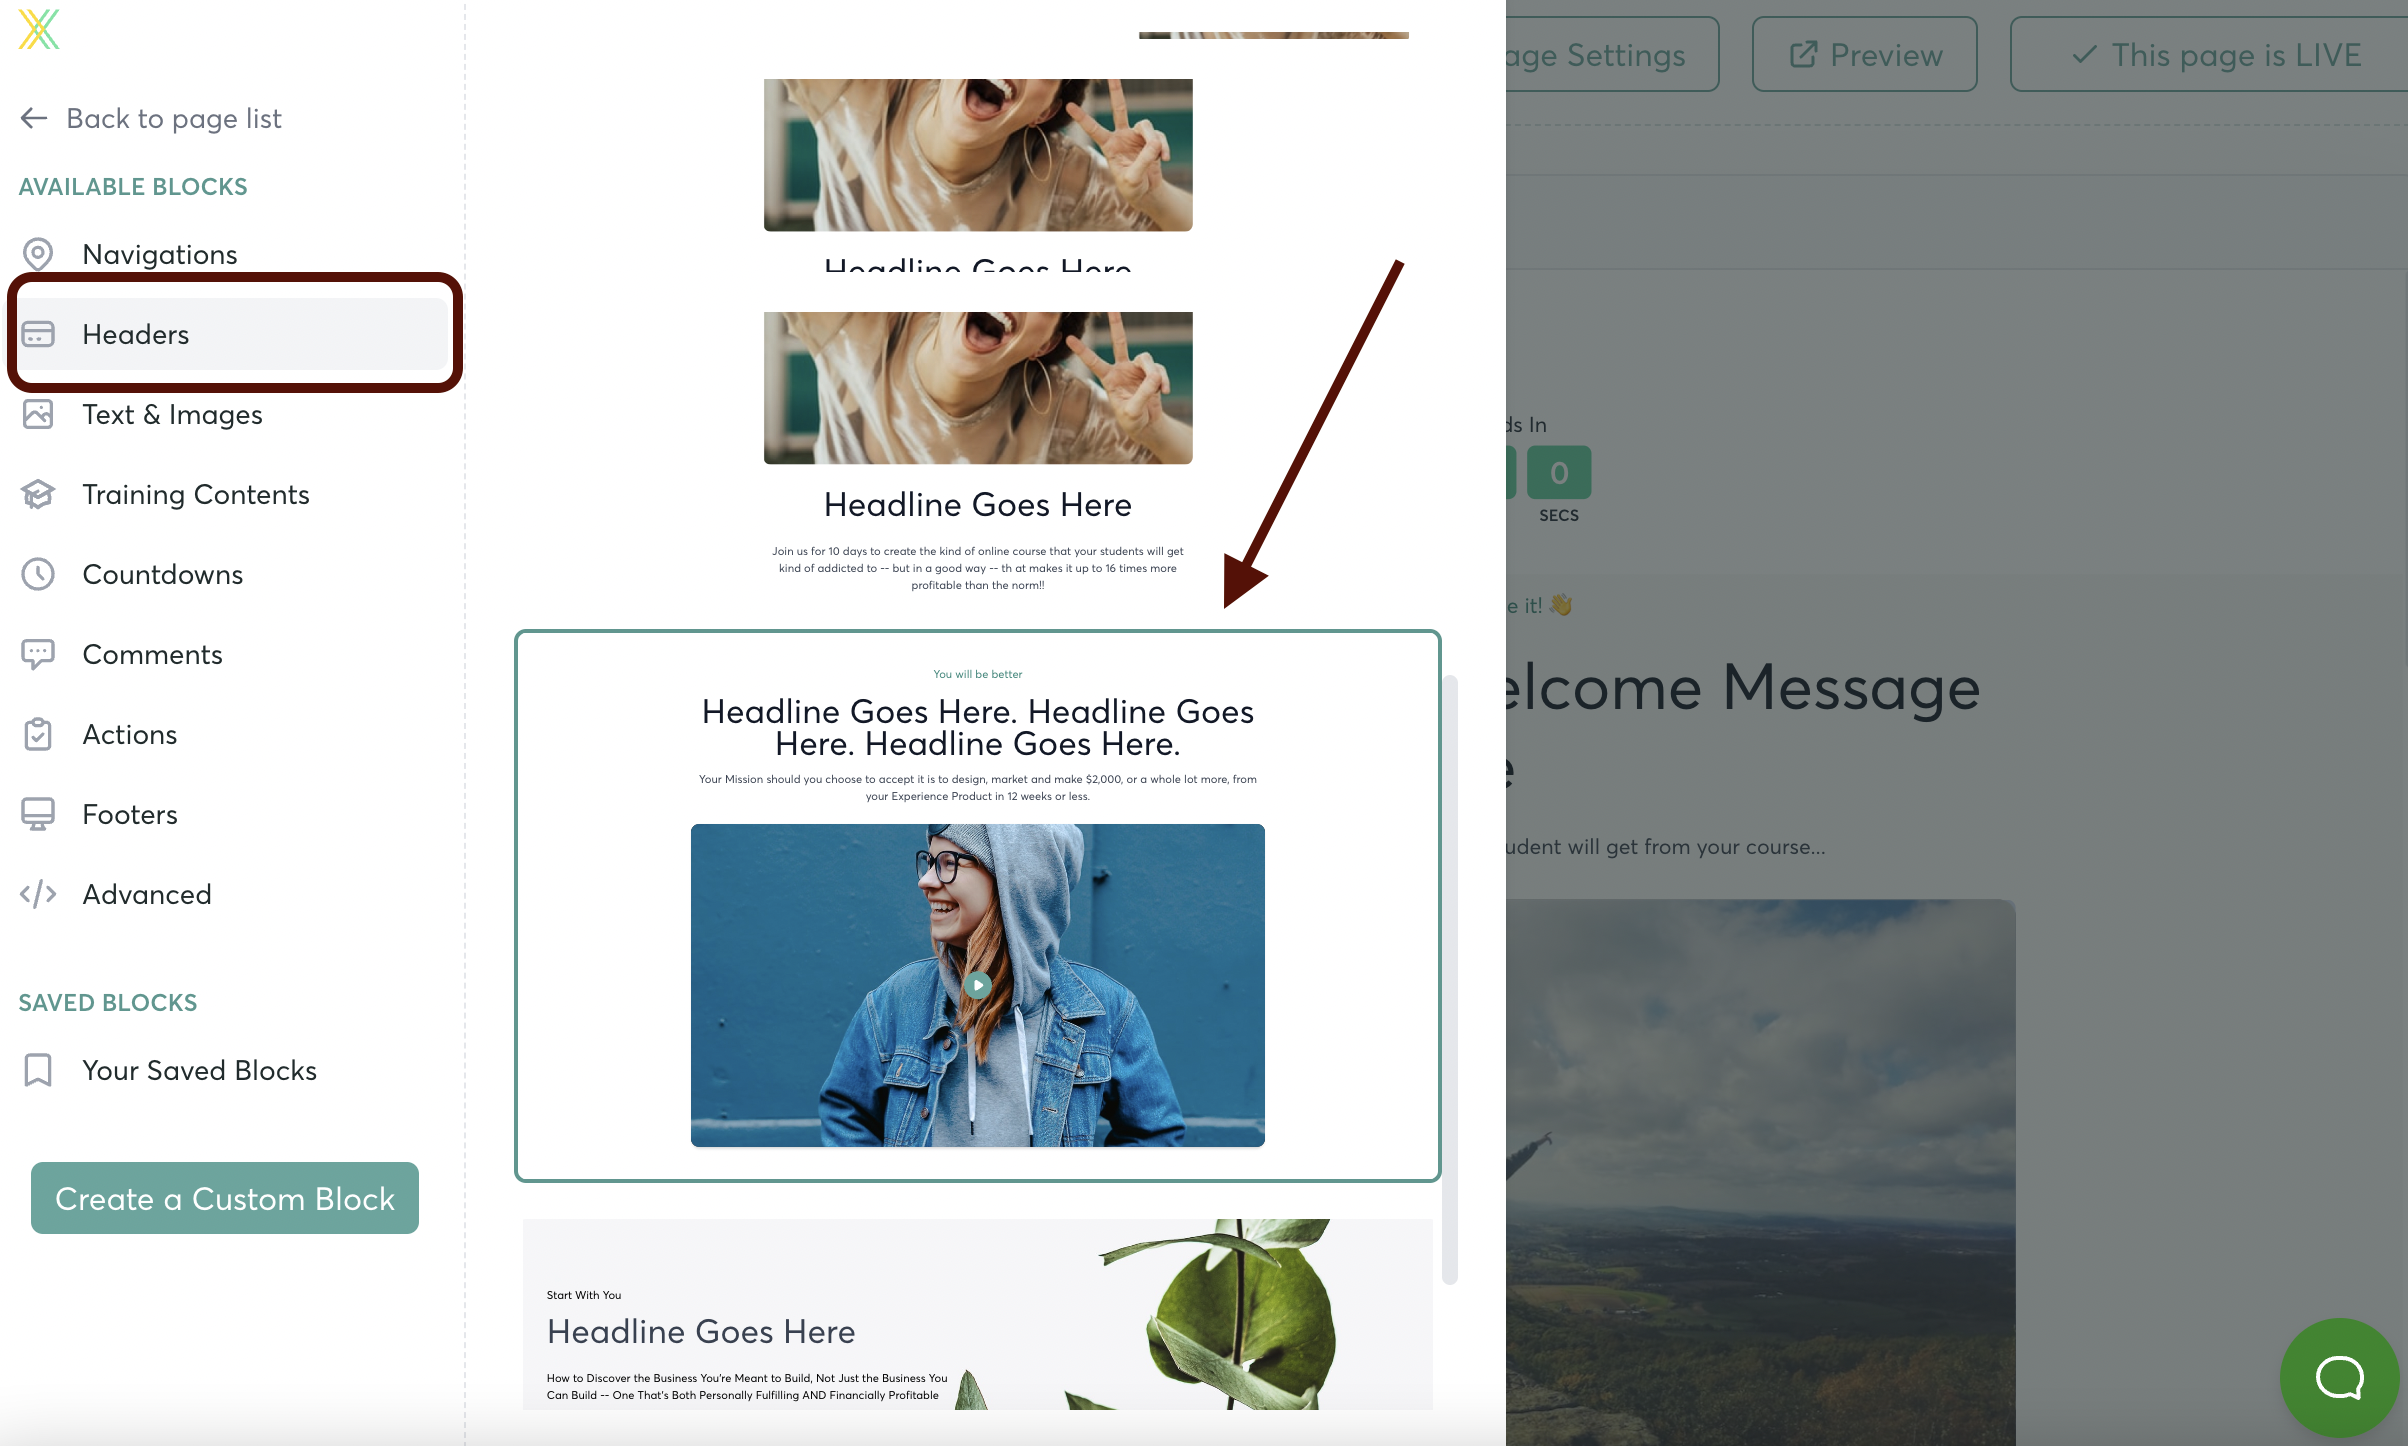
Drag it to the right, and drop it onto your page.
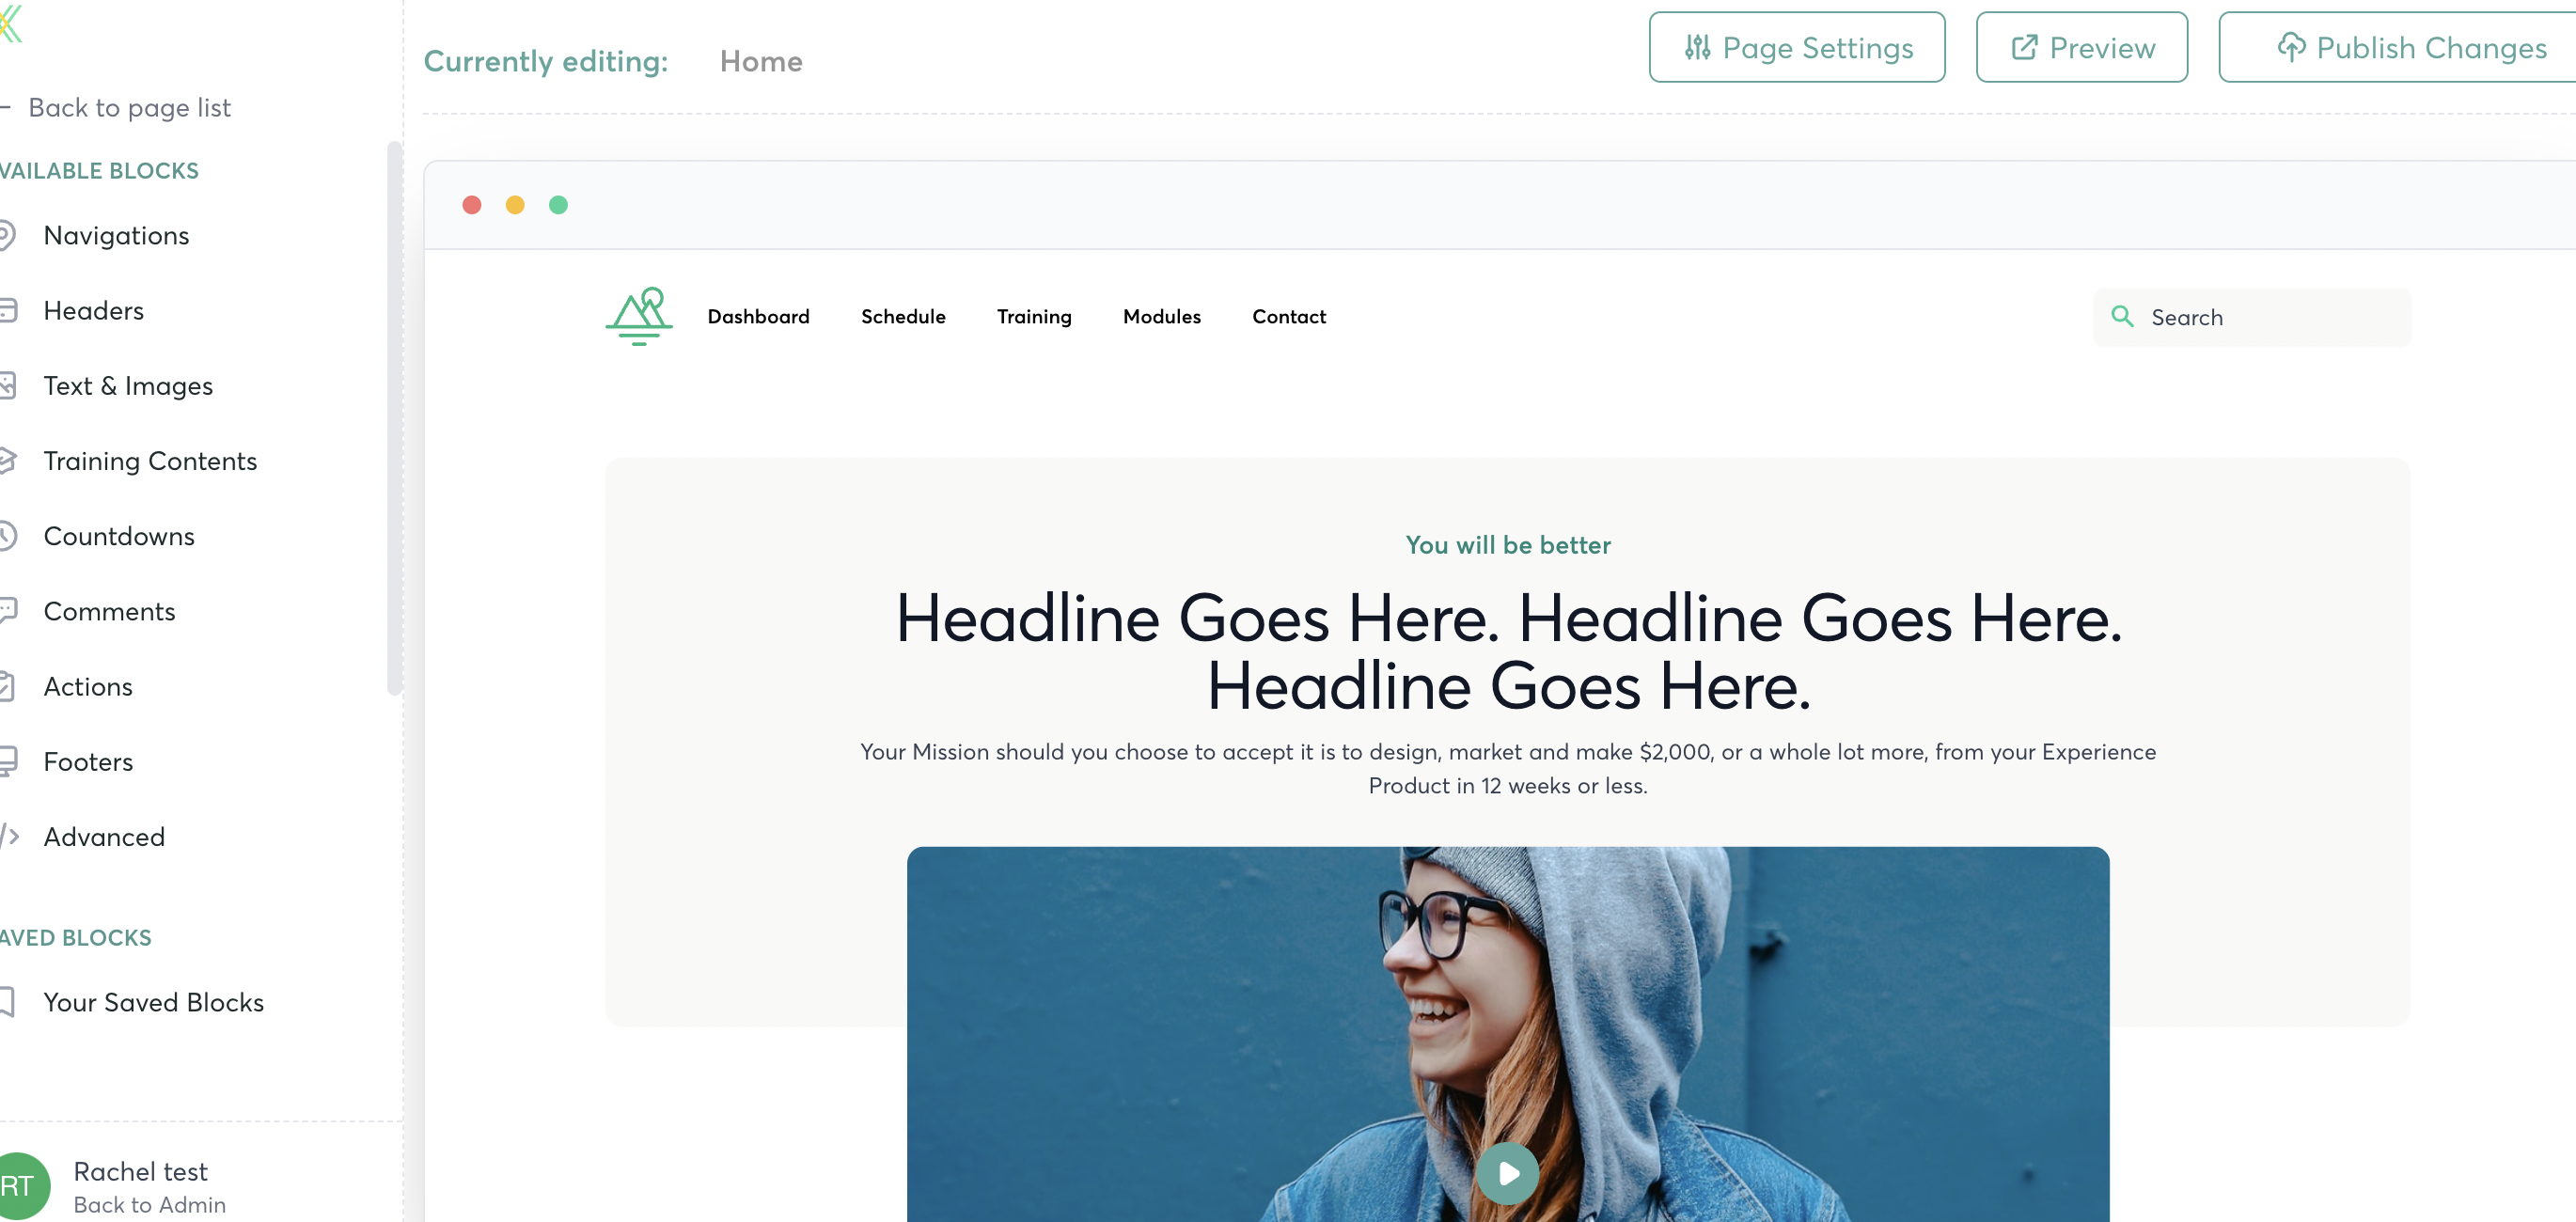
Hover over the Block, and click to Edit:
Once inside the block, click on the Column:
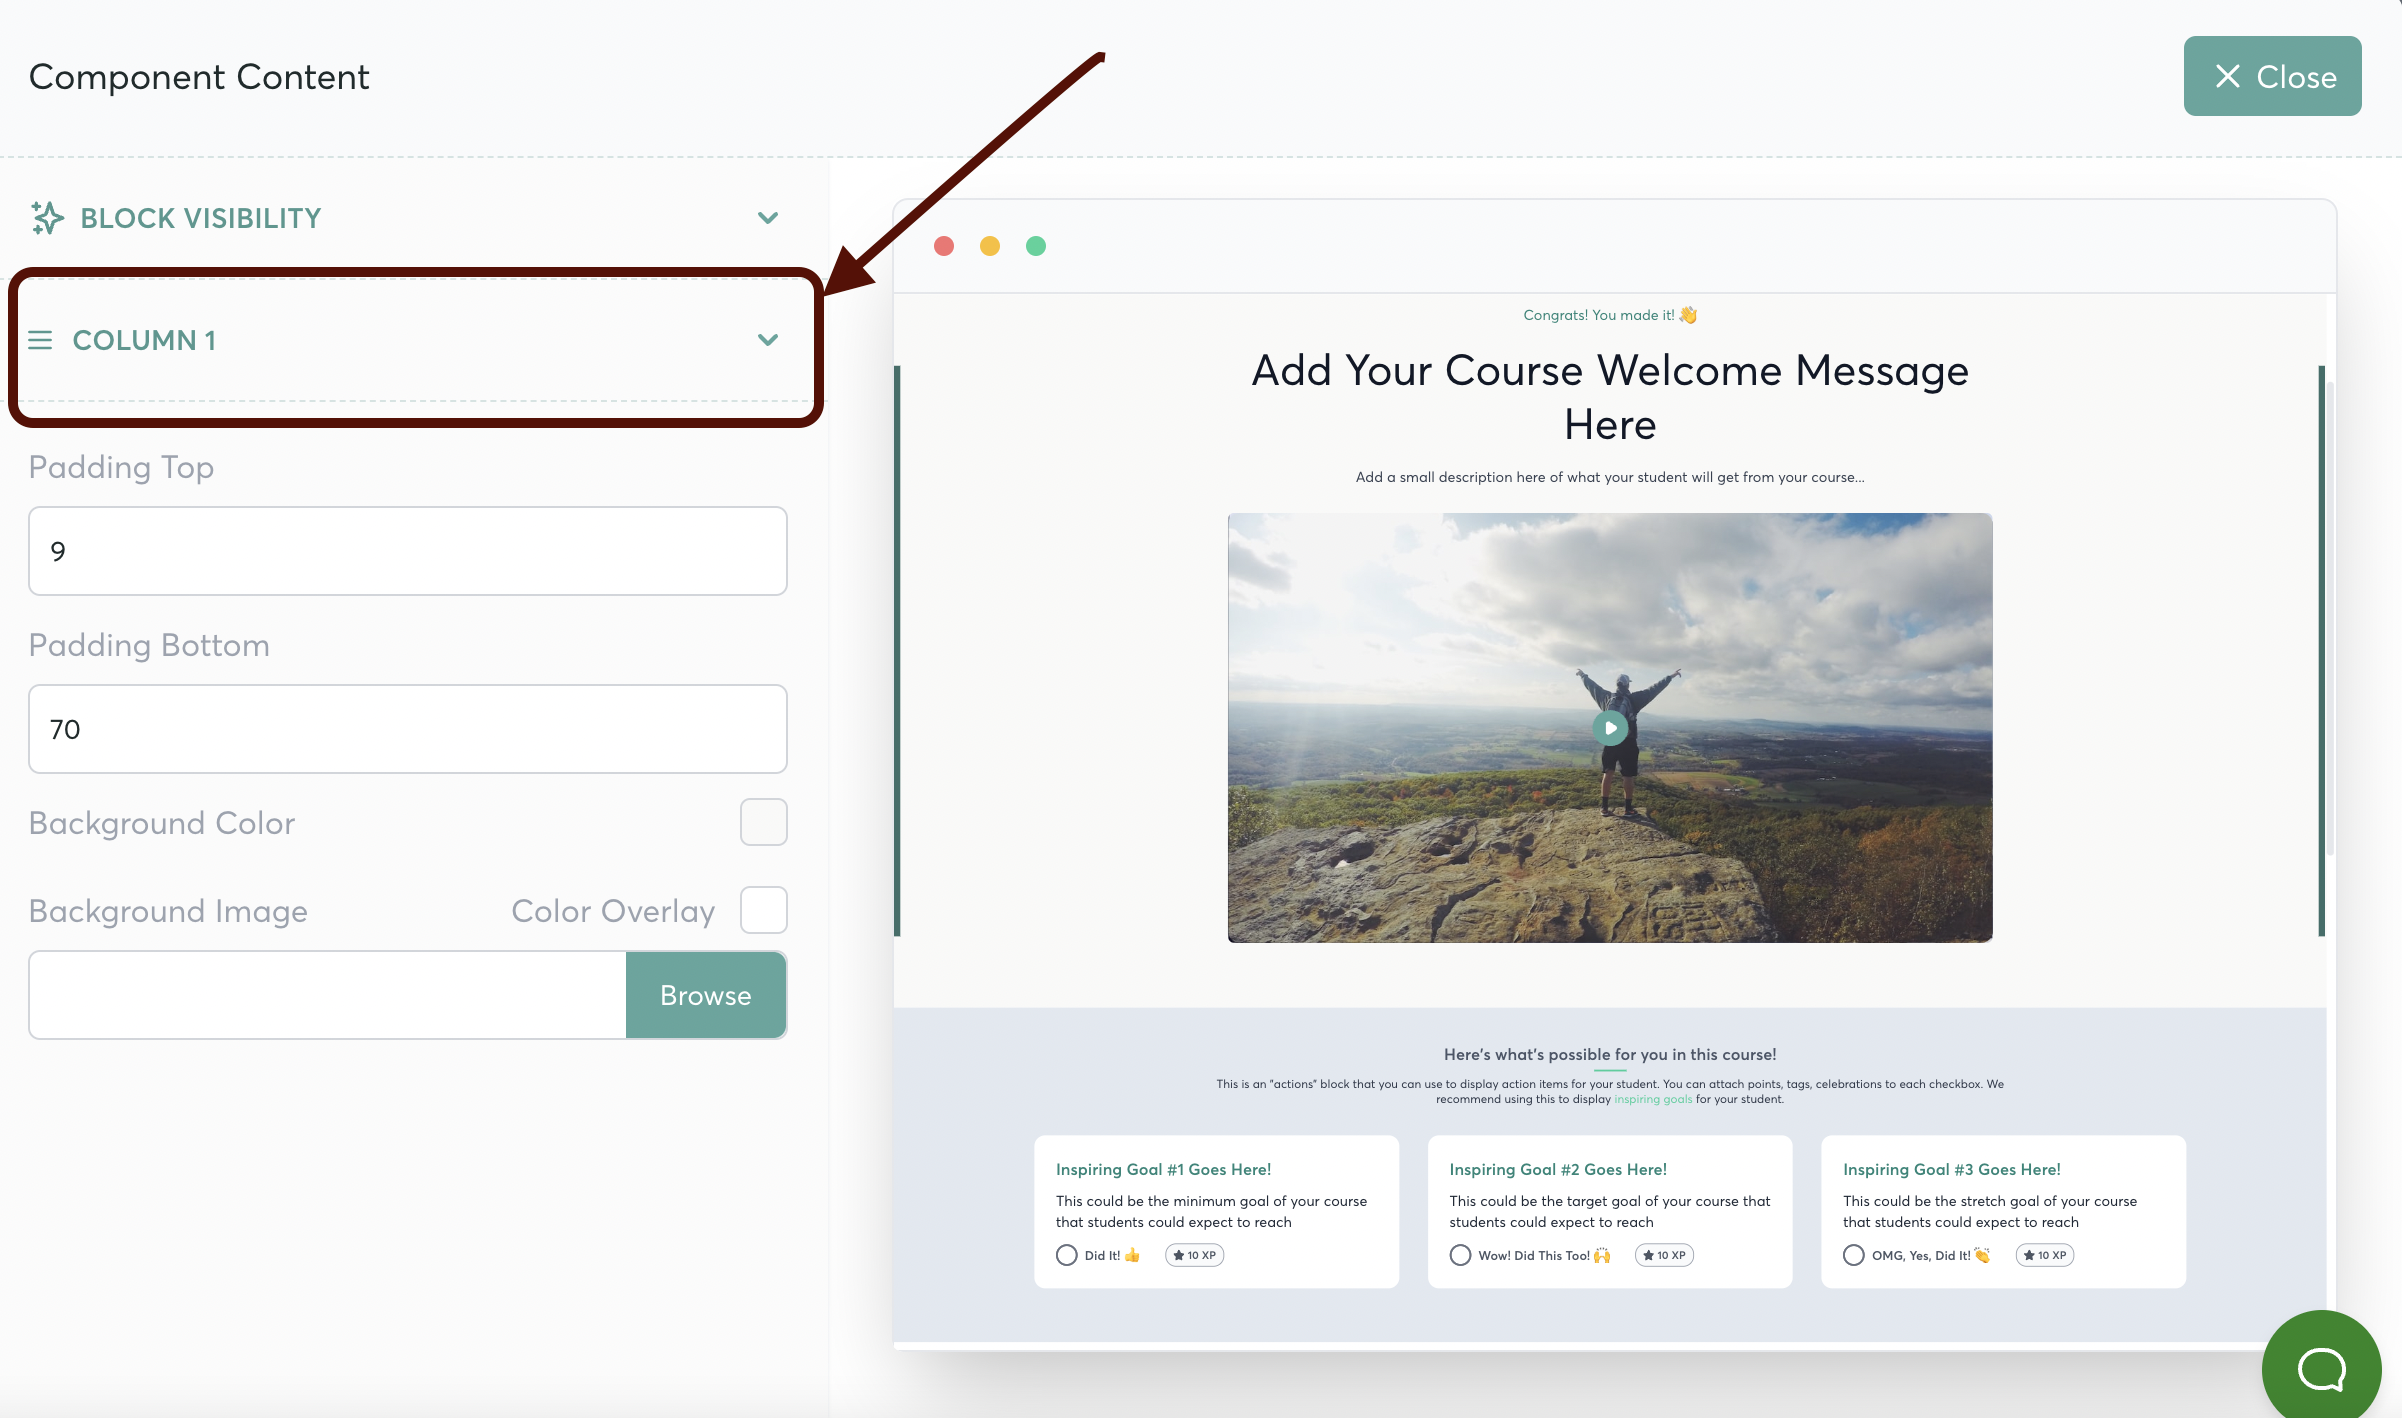
You'll see options for customizing each line of Text. (Click on any arrow to edit the content)
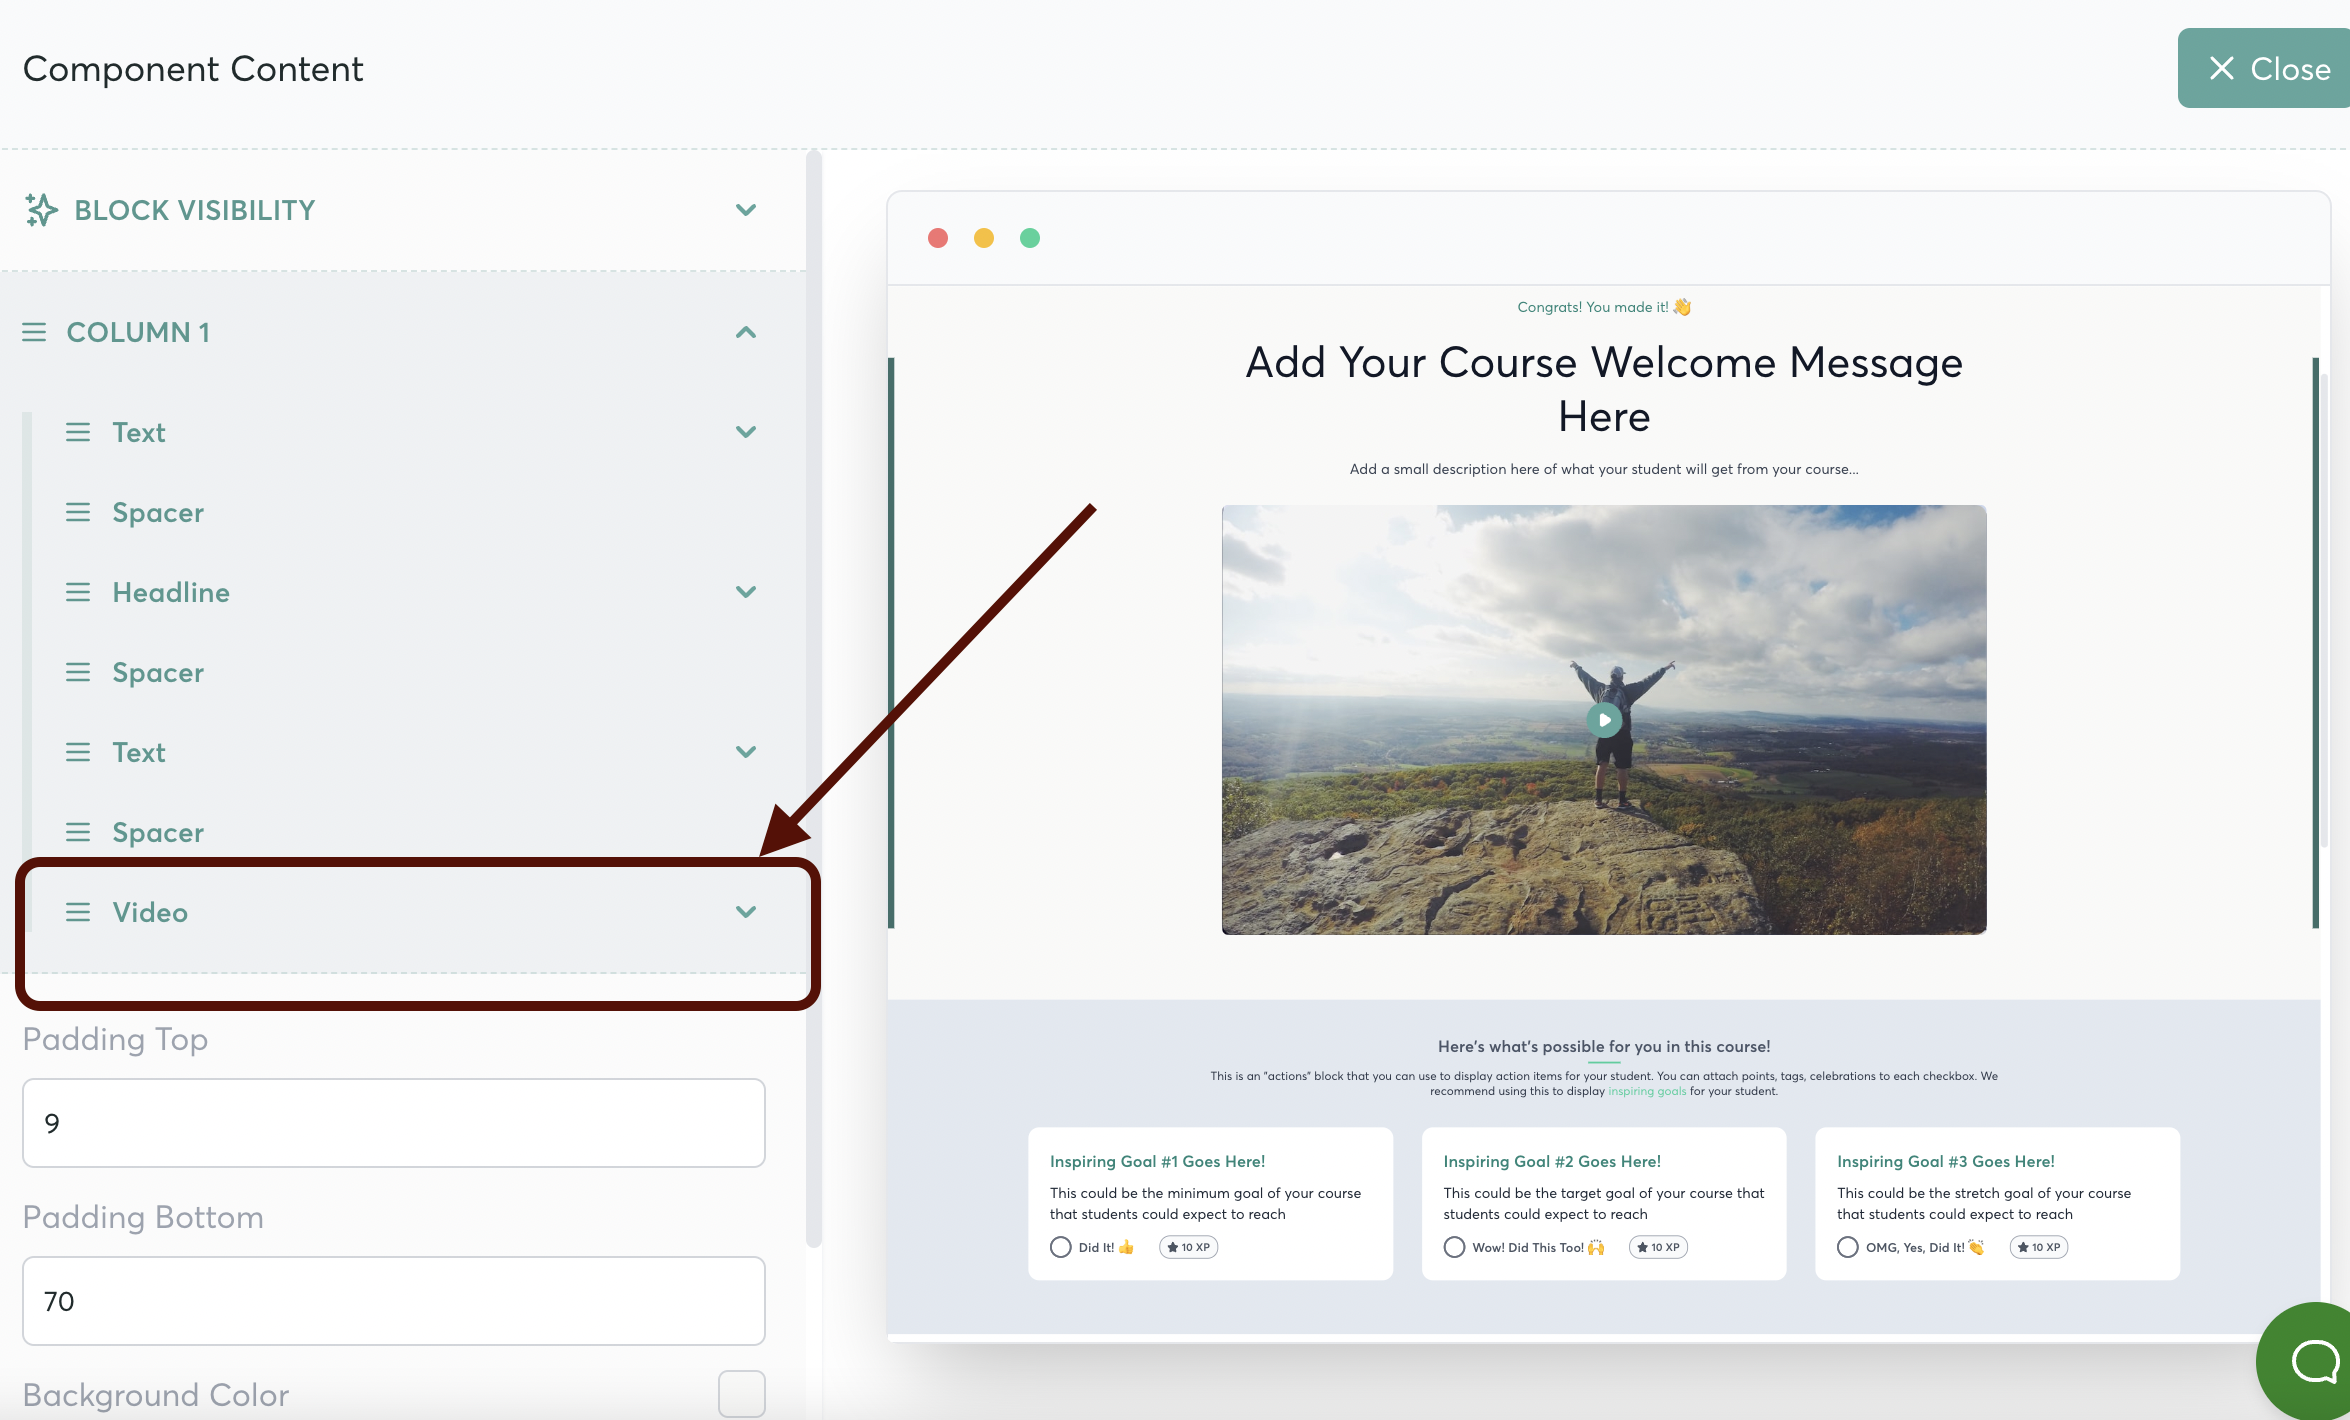
To add your video (.mp4 or .mov file), open the menu for the Video option
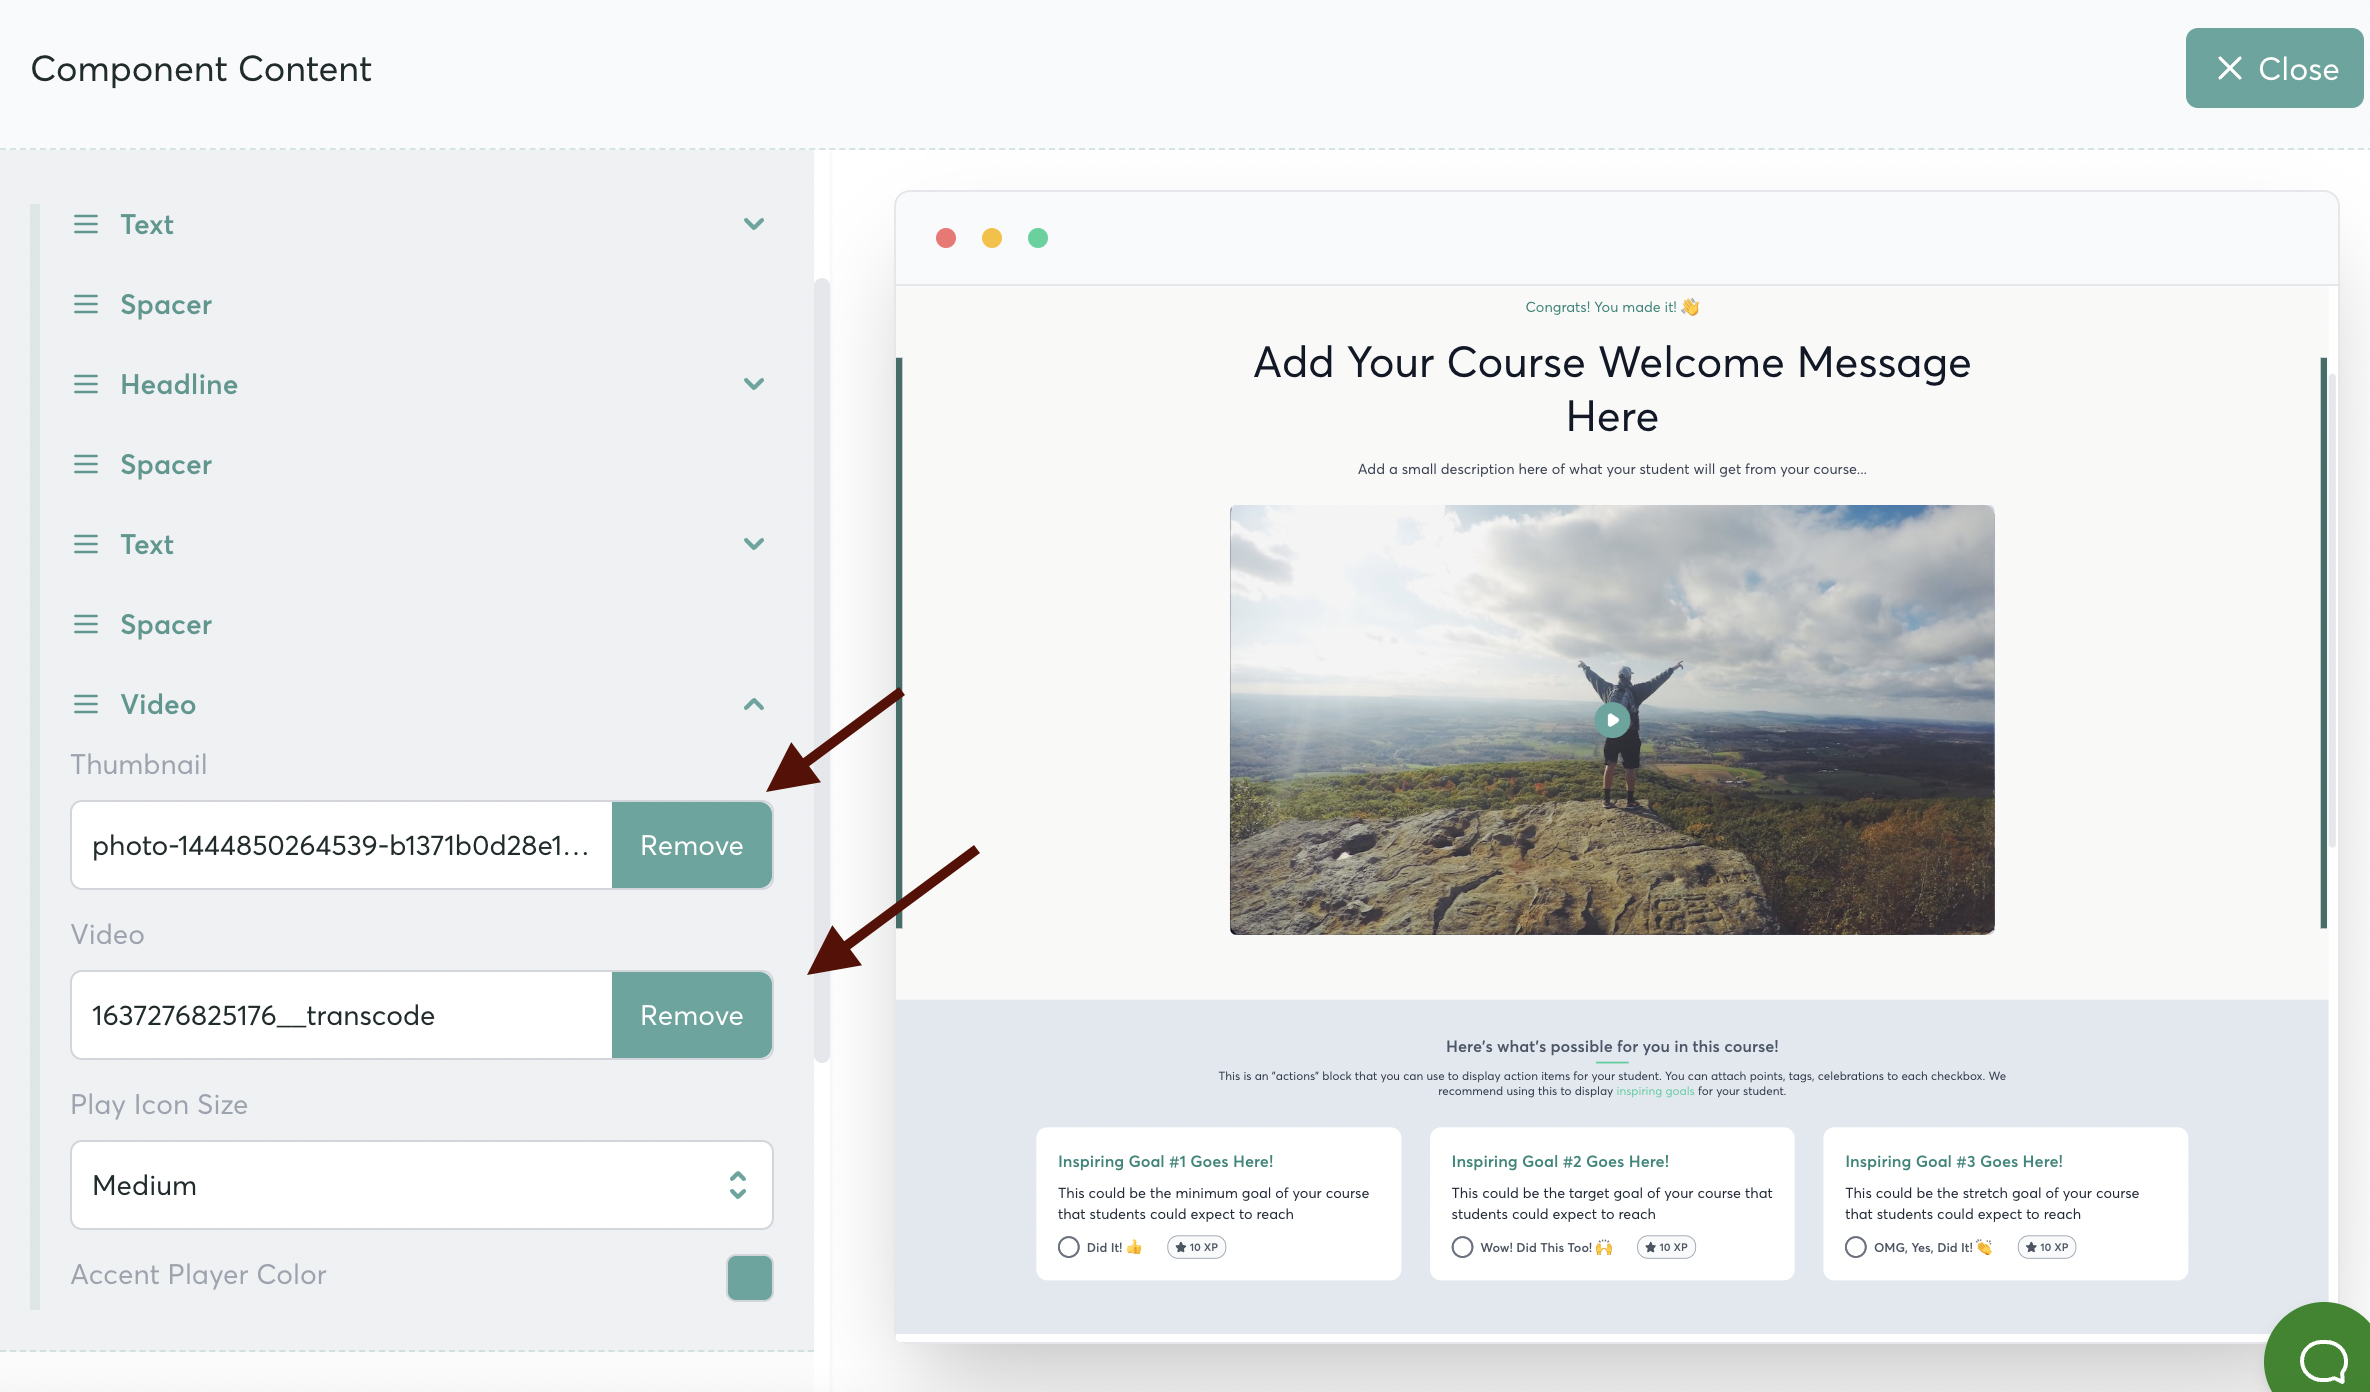
Select a thumbnail and upload your video here:
Continue customizing the content of each Block of your Home Page
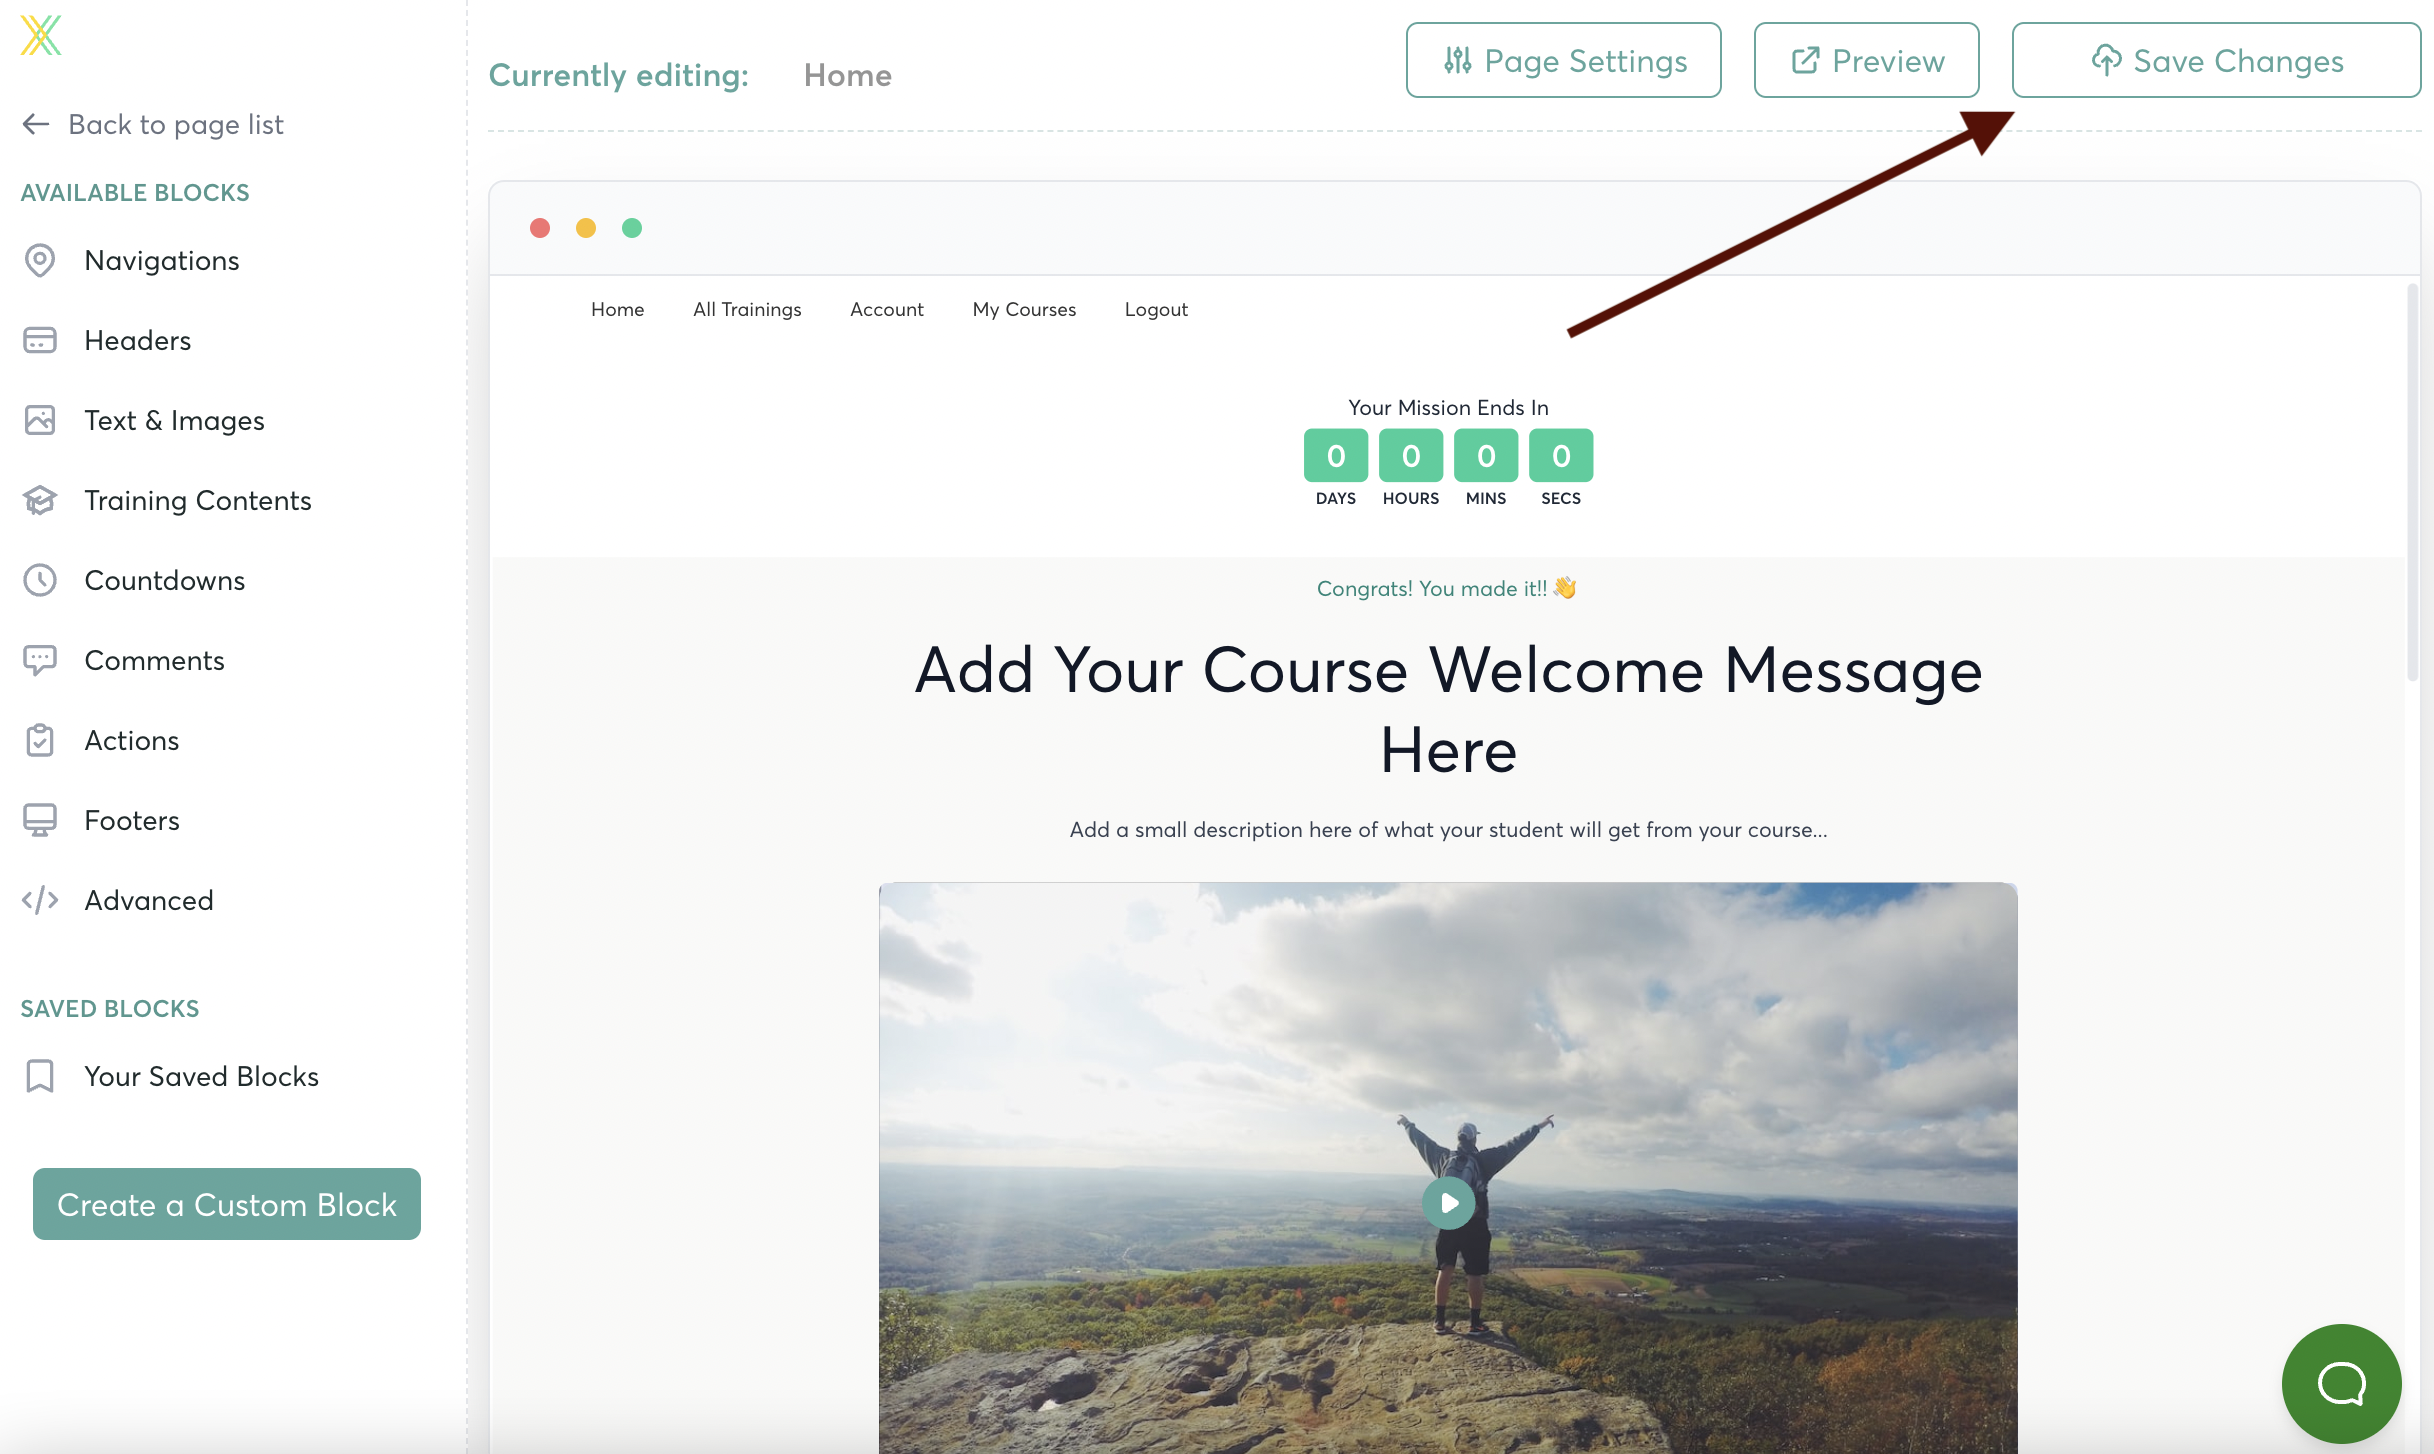
Remember to Save your changes!