What is Zapier?
Zapier lets you connect Xperiencify to 1,500+ other web services.
Automated connections called "Zaps", set up in minutes with no coding, can automate your day-to-day tasks and build workflows between apps that otherwise wouldn't be possible. (For example, you can connect with your favorite CRM, email provider, database, G-suite, or 1500+ other web or cloud-based applications.)
Each Zap has one app as the Trigger (in other words, where your information comes from), which causes one or more Actions in other apps, where your data gets sent automatically.
What kinds of things can I do with Zapier & Xperiencify?
Click here to see the more things that are possible with Xperiencify and Zapier!
How to Connect & Authenticate the XP Integration
- Log in to your Zapier account or create a new account
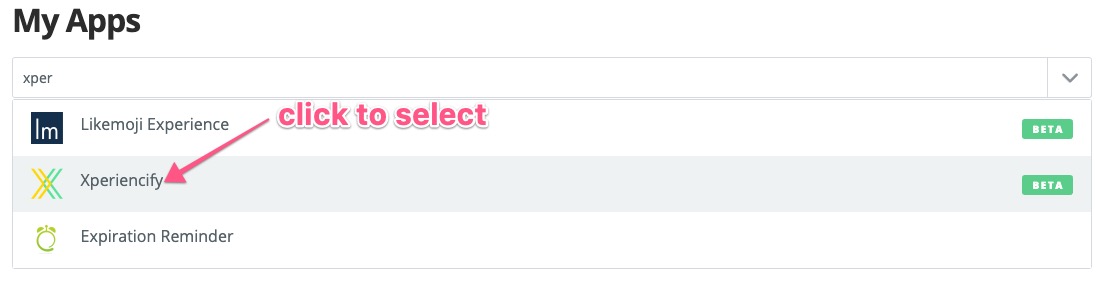
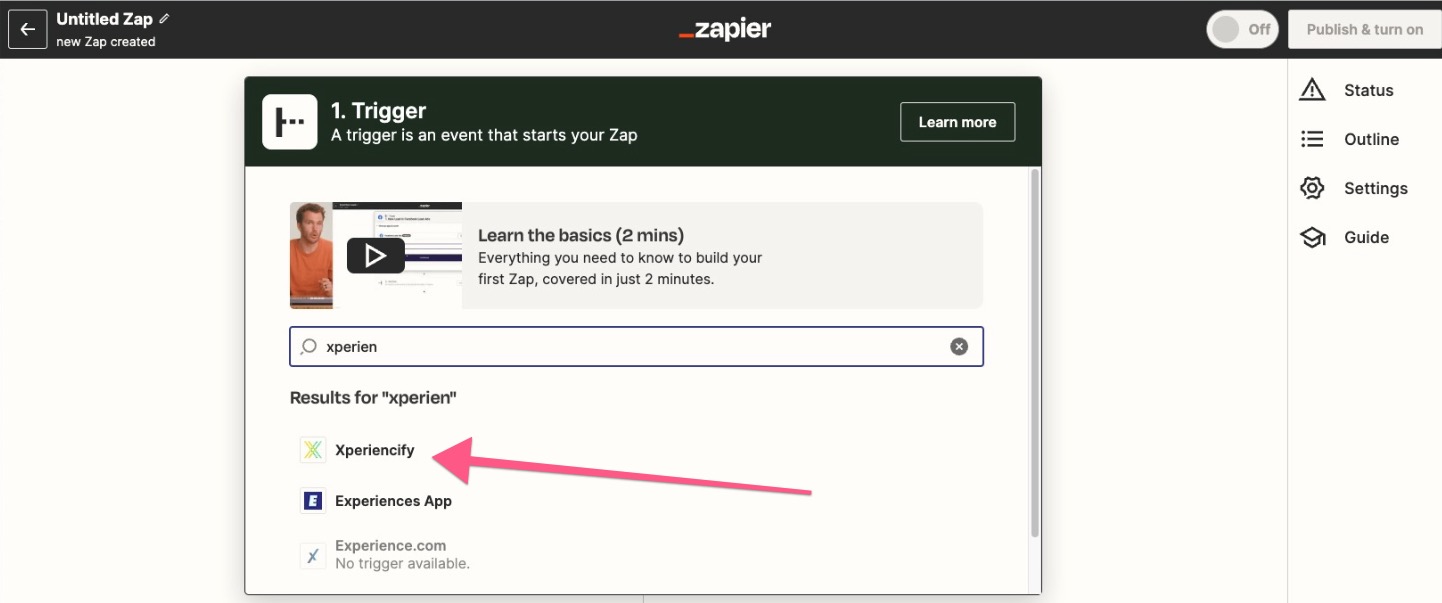
- Once logged in, go to My Apps and search for "Xperiencify". When you see the icon, click on it to use it
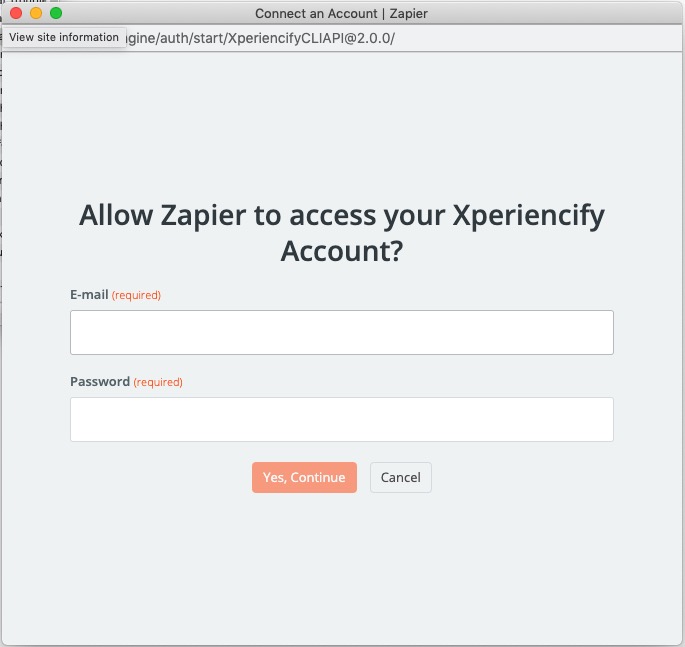
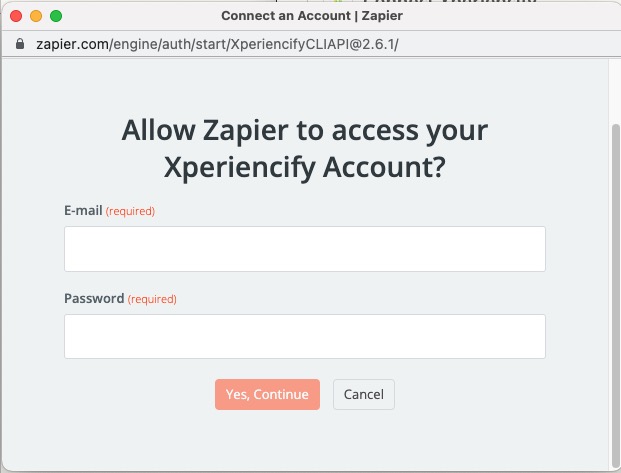
- A new popup will appear to authorize the connection with Xperiencify. Enter your XP login email address and password into the fields and click Yes, Continue:
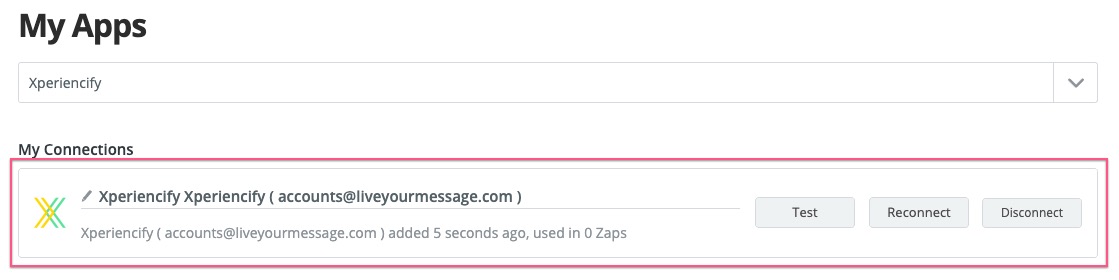
- Once successfully processed, you should see a page like this, indicating that your Xperiencify integration will be ready to use!
How to Setup a New Student Zap
This is the most common kind of Zap that most people will set up and it allows you to do things such as:
- Trigger an email campaign in a tool such as Mailchimp or Active Campaign
- Add to (and tag) in a CRM such as Infusionsoft or Zoho
- Send a welcome SMS message through tools such as Twilio or Clicksend
- And much much more...
Before setting up the "New Student" zap, you'll want to add a test student into your course so that we have "test" data to see in Zapier when we test your zap. Once you've done that, proceed with the setup using the steps below:
- Log in to Zapier, and click the orange + Create a Zap button in the top left of the page

- Click on the Xperiencify icon that appears in the Your Apps section at the top of the page. (Note: if you can't see the icon, make sure you have installed the integration successfully using the steps at the top of this article in the "How to Connect & Authenticate the XP Integration" section.)
- Choose "Xperiencify" from the Trigger box that appears at the top of the page, like this:
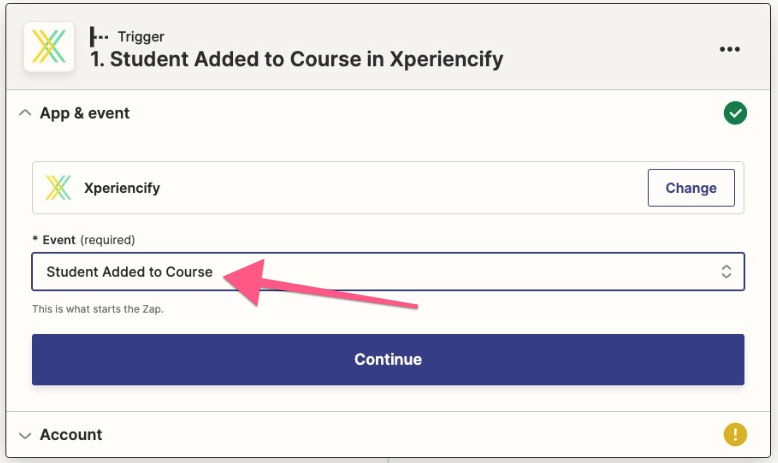
- Choose Student Added to Course from the Event droplist. Once done, click Continue
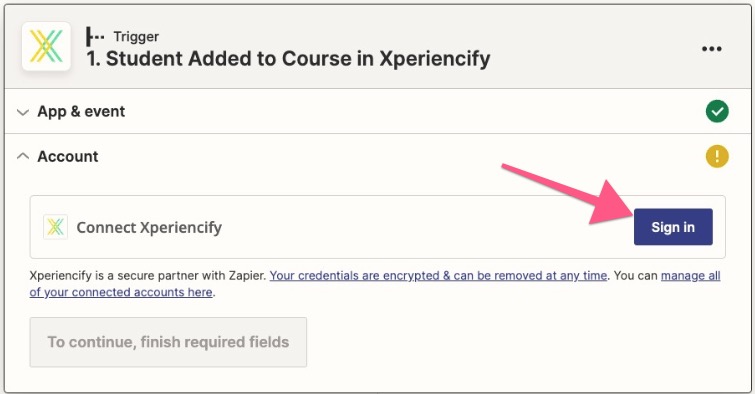
- Click Sign In to connect your Xperiencify account
- A box will pop up for you to add your Xperiencify login information. Enter your XP login email address and XP password into the fields, and click the "Yes, Continue" button. If you receive an error message while trying to connect, please check your login details.
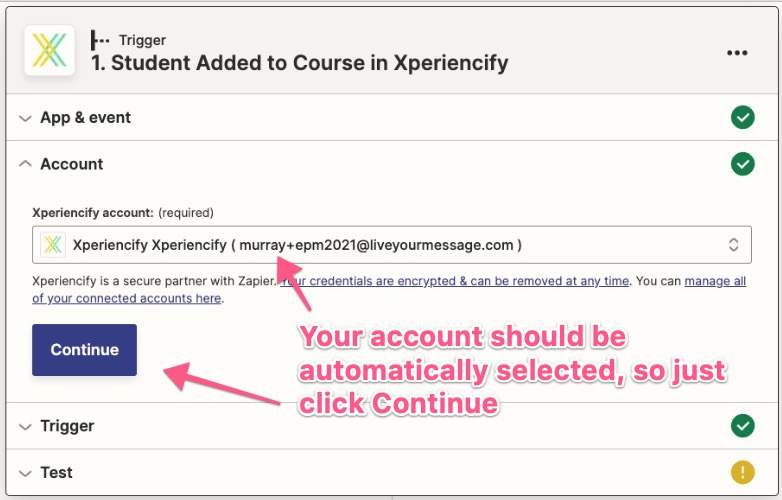
- After successfully connecting your XP account, you'll see this in the box. Your account should be automatically selected, so just click the Continue button to continue with the setup of your Zap
- Next step is to choose which course you want to be notified about when new students join. Choose the course from the Course droplist

- Once selected, click the Continue button to proceed to the last setup step for this part of the zap – the testing.
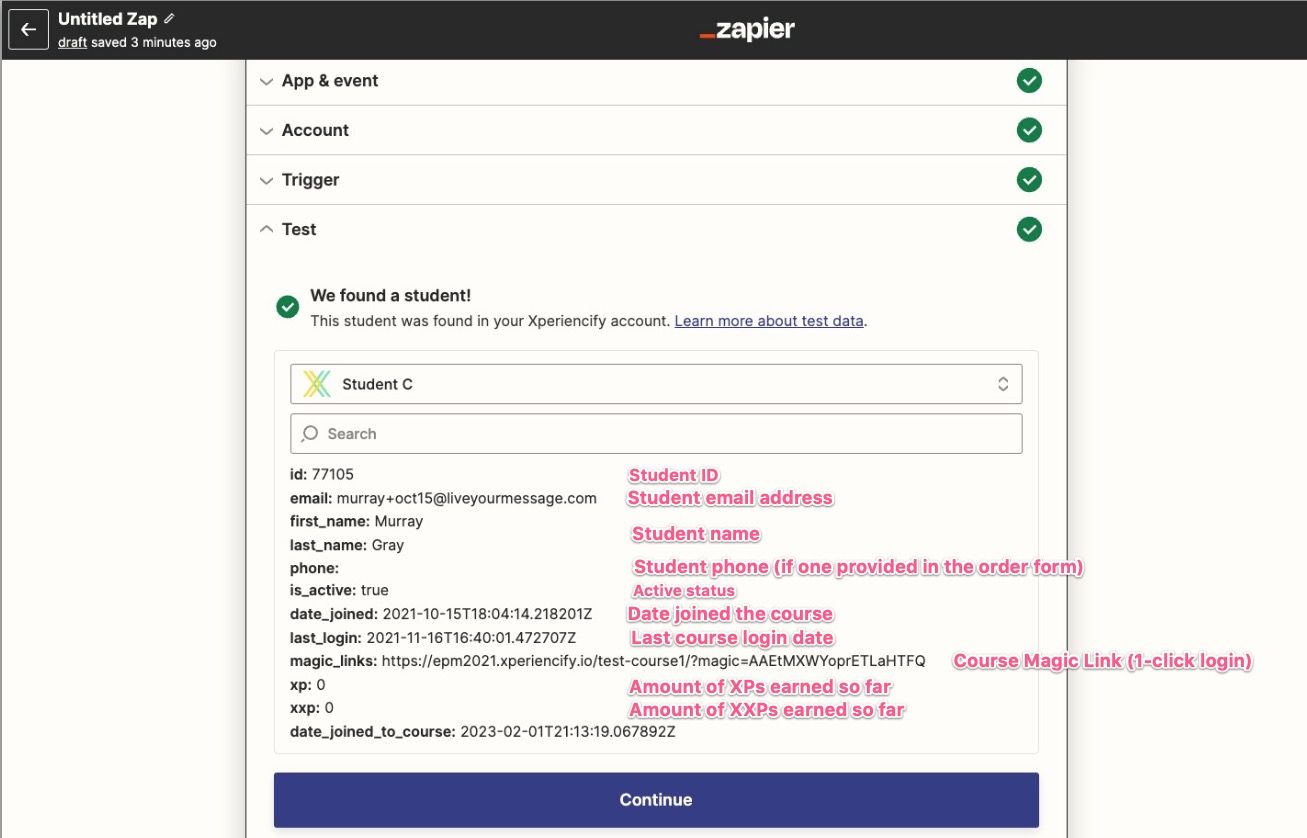
- Click the Test trigger button to test your zap. If you added a test student to your course at the start as was recommended, you should see that test student now when you test your zap. You'll see something like the image below. Click Continue to proceed.
Now we've reached Step 2 of your zap where you choose what to do with your new student data.
In other words, where are you sending the data now that you have it? In this example I'm going to dump the data into a Google Sheet, but you could send the data anywhere you'd like.
- Click to add your app by choosing it from the droplist in the "App & event" section, and then choose the action you'd like to do with the data by selecting it from the Event droplist. When you've selected those options, click Continue.

- Choose your app's account to use. In this example, I'm going to be using my own Google Sheets account. (Note: depending on whether you've already connected your 2nd app or now, you may have to do it now.) When you've selected those options, click Continue.
- In this example, I've chosen a Google Sheet into which I'm going to send the data. For the app that you're working with you'll have different steps to setup your destination
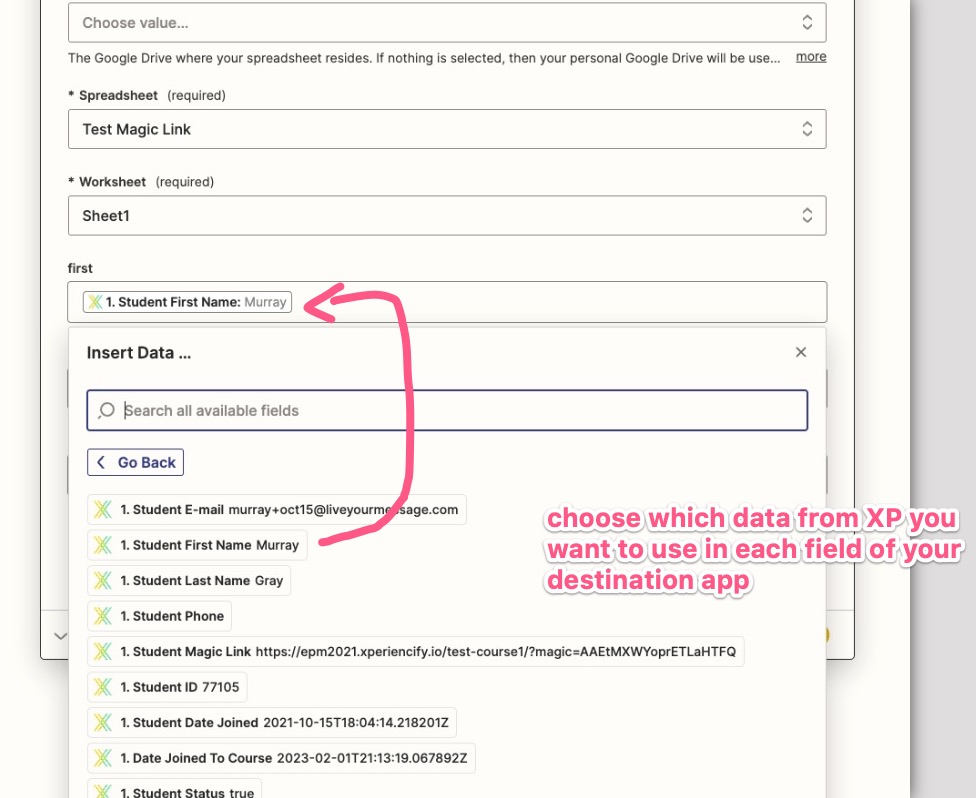
- Next, choose which XP data you want to send to each field of your destination app. In this example, I've sent the Student First Name data to the first field above, in my destination Google Sheet
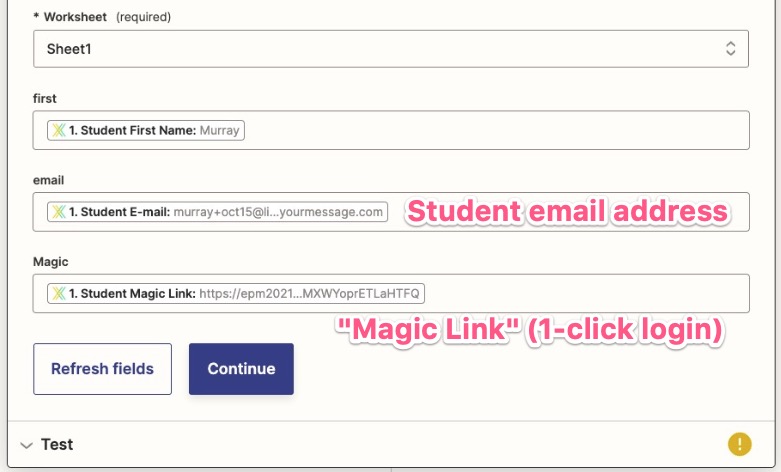
- And another example of sending the student's email address and their "Magic Link", which is a 1-click login link direct to the course that the student enrolled into. This "Magic Link" is what you give to your student to let them log in to their course. IMPORTANT NOTE: We don't send the student's account password back through Zapier, because it gets encrypted IMMEDIATELY the student record is created for privacy.
Some more words about student passwords:
- As mentioned above, we don't send the student's account password back through Zapier. We encrypt passwords as soon as the student record is created to maintain the highest levels of security for the student, so if you're using this Zap to pull student information out of XP, an you intend to communicate with the student about their course outside of XP, then you'll need to rely on the Magic Link to provide your students access to their course material
- If you do want to have a record of their password, then you can host an enrollment / opt-in / order form on YOUR website, and pass the student's selected password to us using our Add Student to Course zap which allows you to pass in a password string for the student.
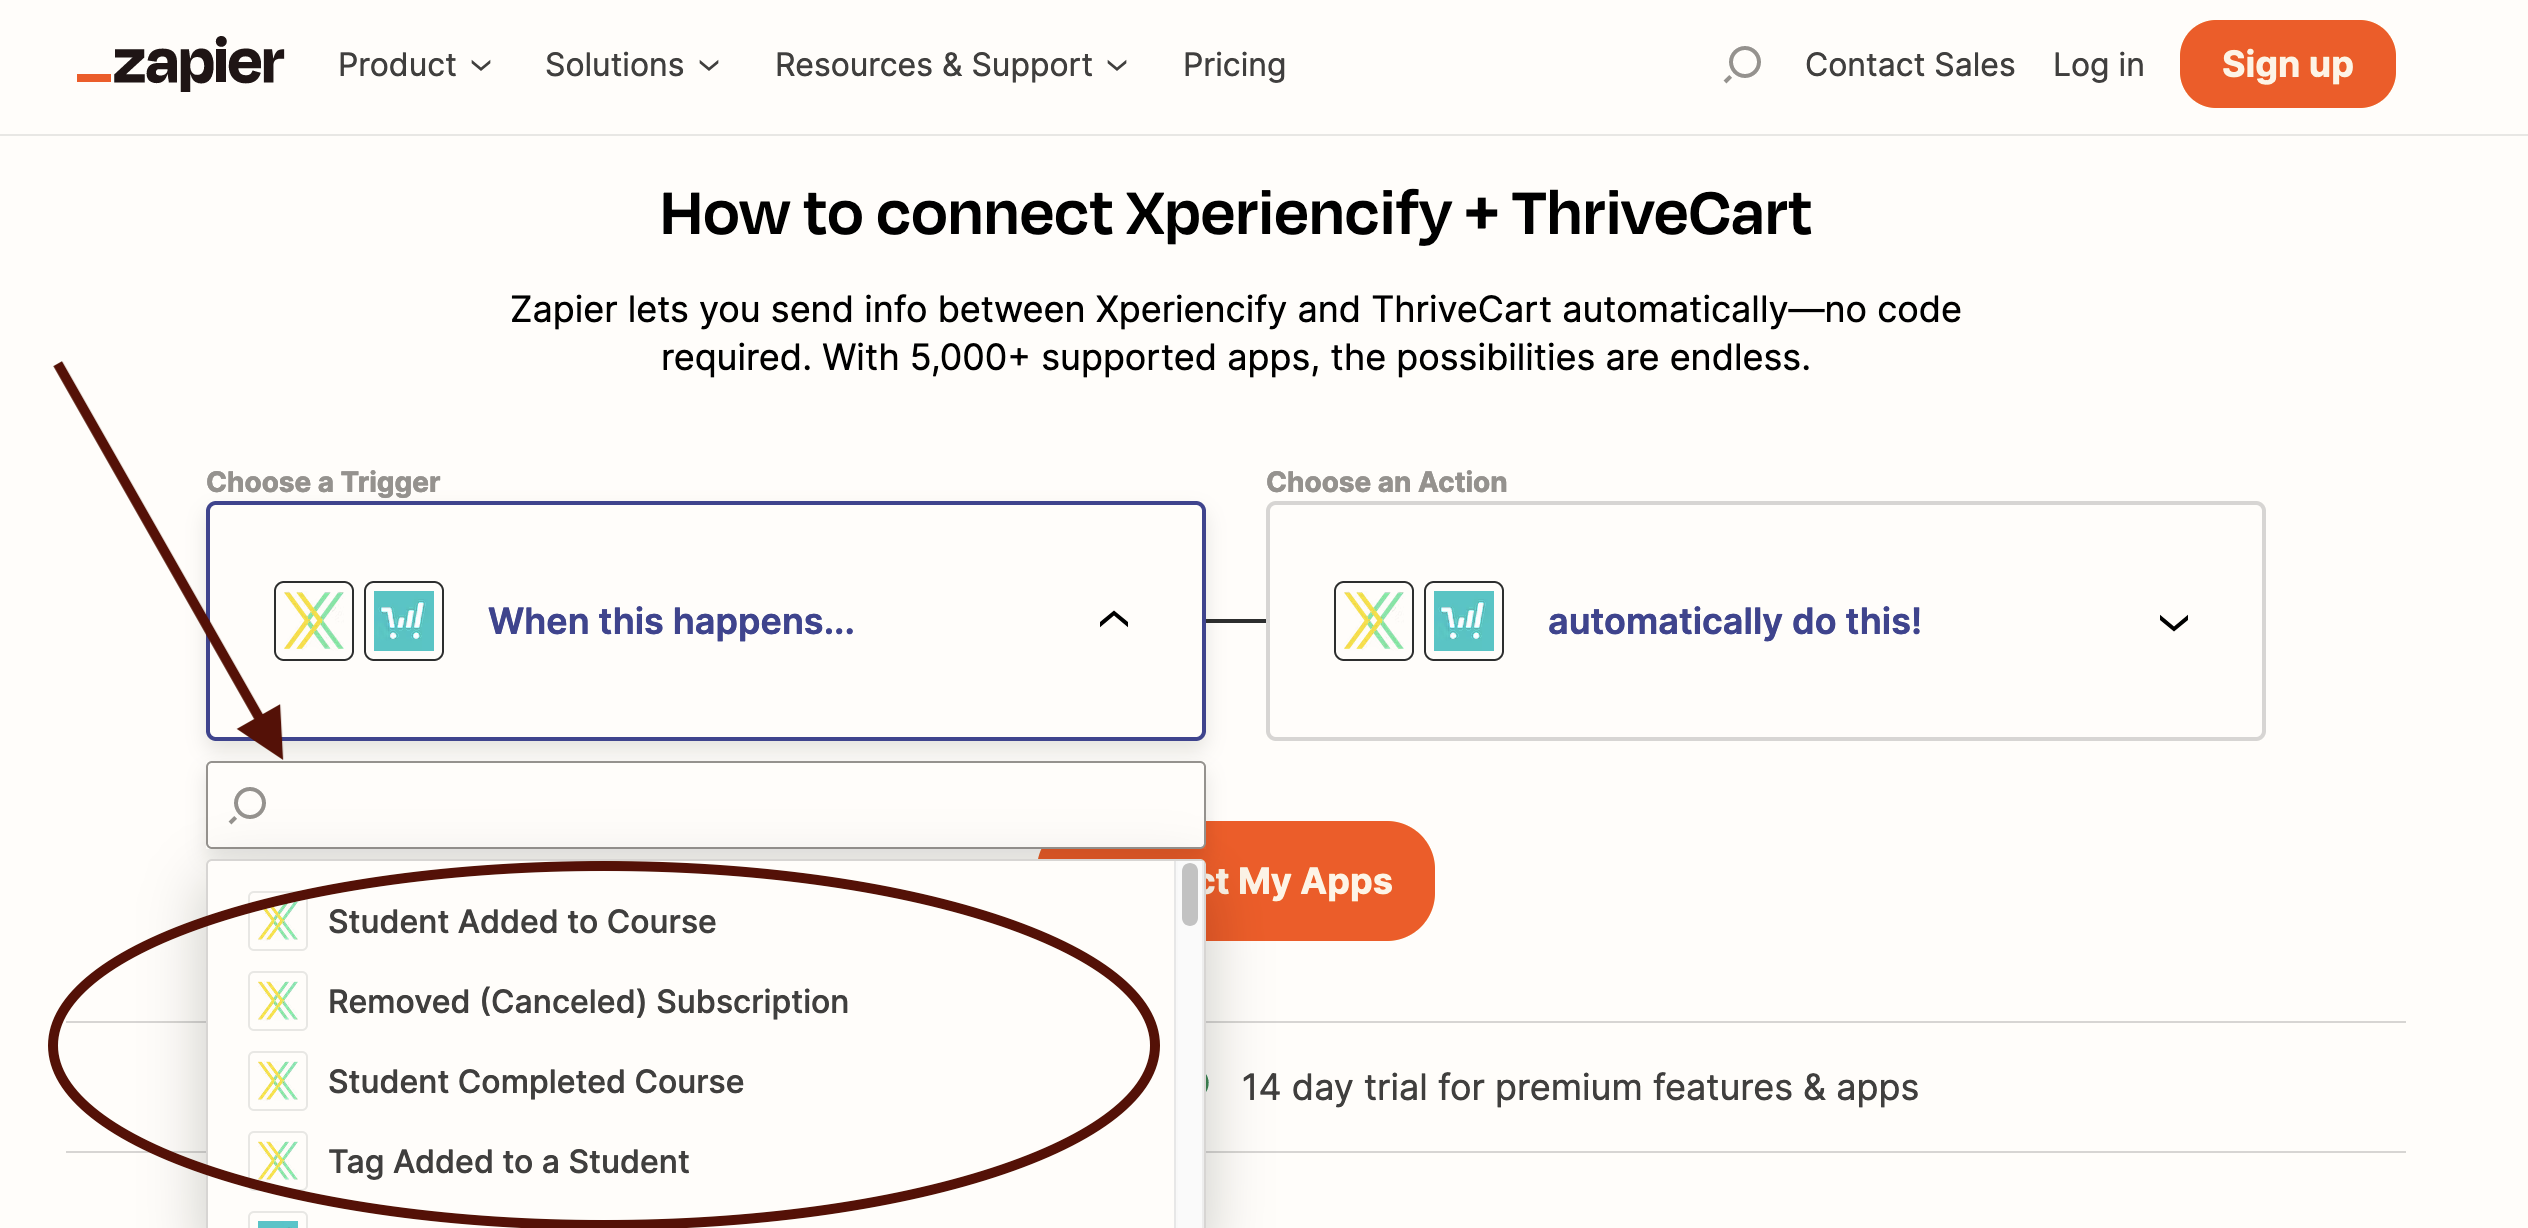
Available Outgoing Zaps
We've now added MORE outgoing Triggers for Zaps, to give you tons of options for integrating with 1500+ over platforms!
Here's the outgoing Zaps that you have available:
- Student Added to Course
- Tag Added to a Student
- Student Completed Course
- Removed (Cancelled) Subscription
Just select the outgoing Trigger that you need, and pair it with the Action that you'd like to happen in the other platform