
This article will only be helpful if you're using XP's in-built order form.
Setting up a Single Payment Course (with Optional Installment Plan)
- Choose Single Payment as your payment style
- Click Add + and type your price into the One Payment Of field
Now, what about installment plans?
An installment plan is a way you can split your course price up into several payments. You can build in a little extra interest if you wish – it's totally up to you how you split your payments!
- To add an installment plan for your Course, scroll down to the Installment Plans section
- Click on the Add a New Installment Plan button
- Enter the details of the installment plan (ie: 6 Monthly payments of $99)
- If you wish to offer more than one payment plan on your order form, simply add them using the Add a New Installment Plan button.

How to Set Up More Than One Payment Option
Quick tip: want to set up more than one single-payment option?
You can do it by using the Installment Plan option, and setting the number of payments to 1.
Setting up a Subscription
A subscription is a payment plan that never ends. For example: if you wanted to bill someone $100 per month until they cancel, you'll use a subscription.
- To add a subscription plan for your Course, click on the Subscription tab
- Click Add + to add your Subscription details
- Enter a payment amount, and the time unit
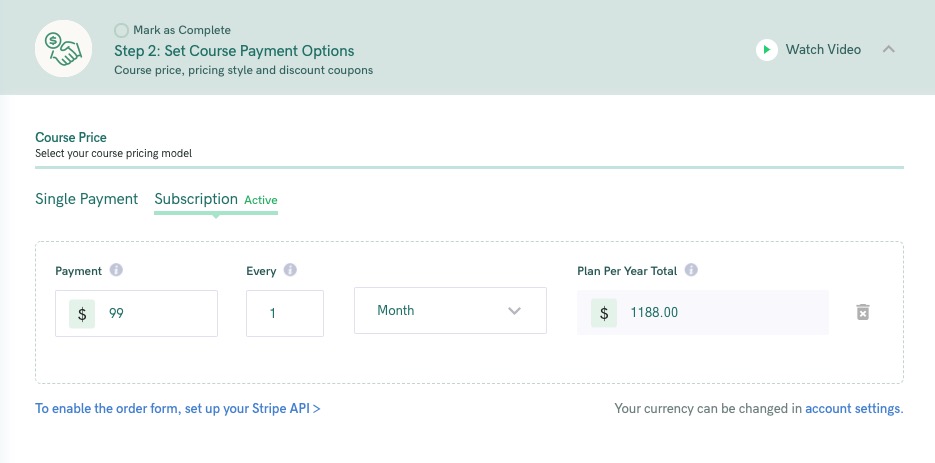
- NOTE: Your Students can manage their own subscription, eliminating extra admin work for you
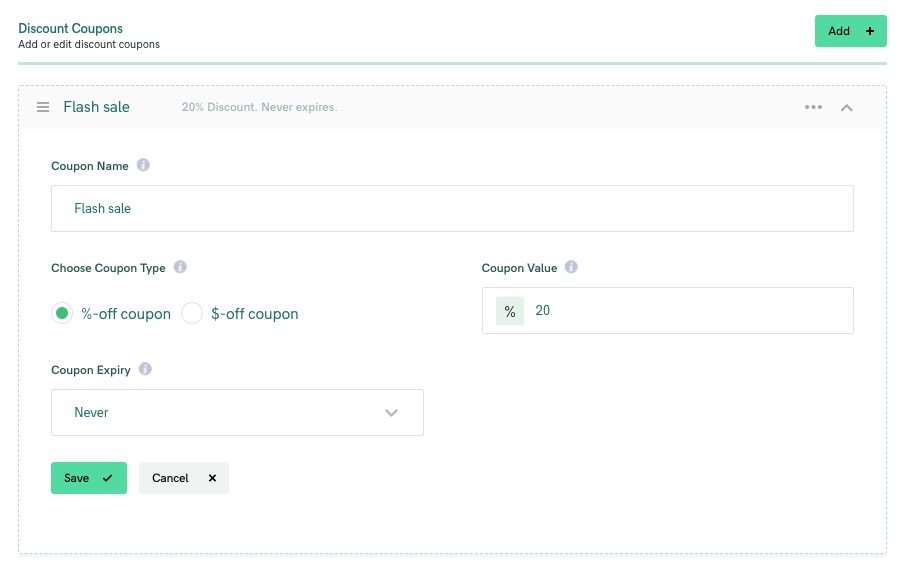
Setting up Discount Coupons
- To add a Discount Coupon for your course, scroll down to the Discount Coupons section
- Type a name into the Coupon Name field -- ie: "Black Friday 20% Off"
- Choose a coupon type: Percent-off, or Dollars-off
- Enter your coupon discount value into the Coupon Value field
- Choose if/when your discount coupon should expire by selecting the appropriate option from the Coupon Expires field
Adding a Tag Based on Payment Option
You can also add a tag to a student, based on the payment option they choose.
This is useful for things like creating a VIP option... for example, you might give the student extra content, or the ability to book a 1:1 session with you.
To set this up, when you Customize your Order Form and Edit Your Payment Options, you'll add a tag:
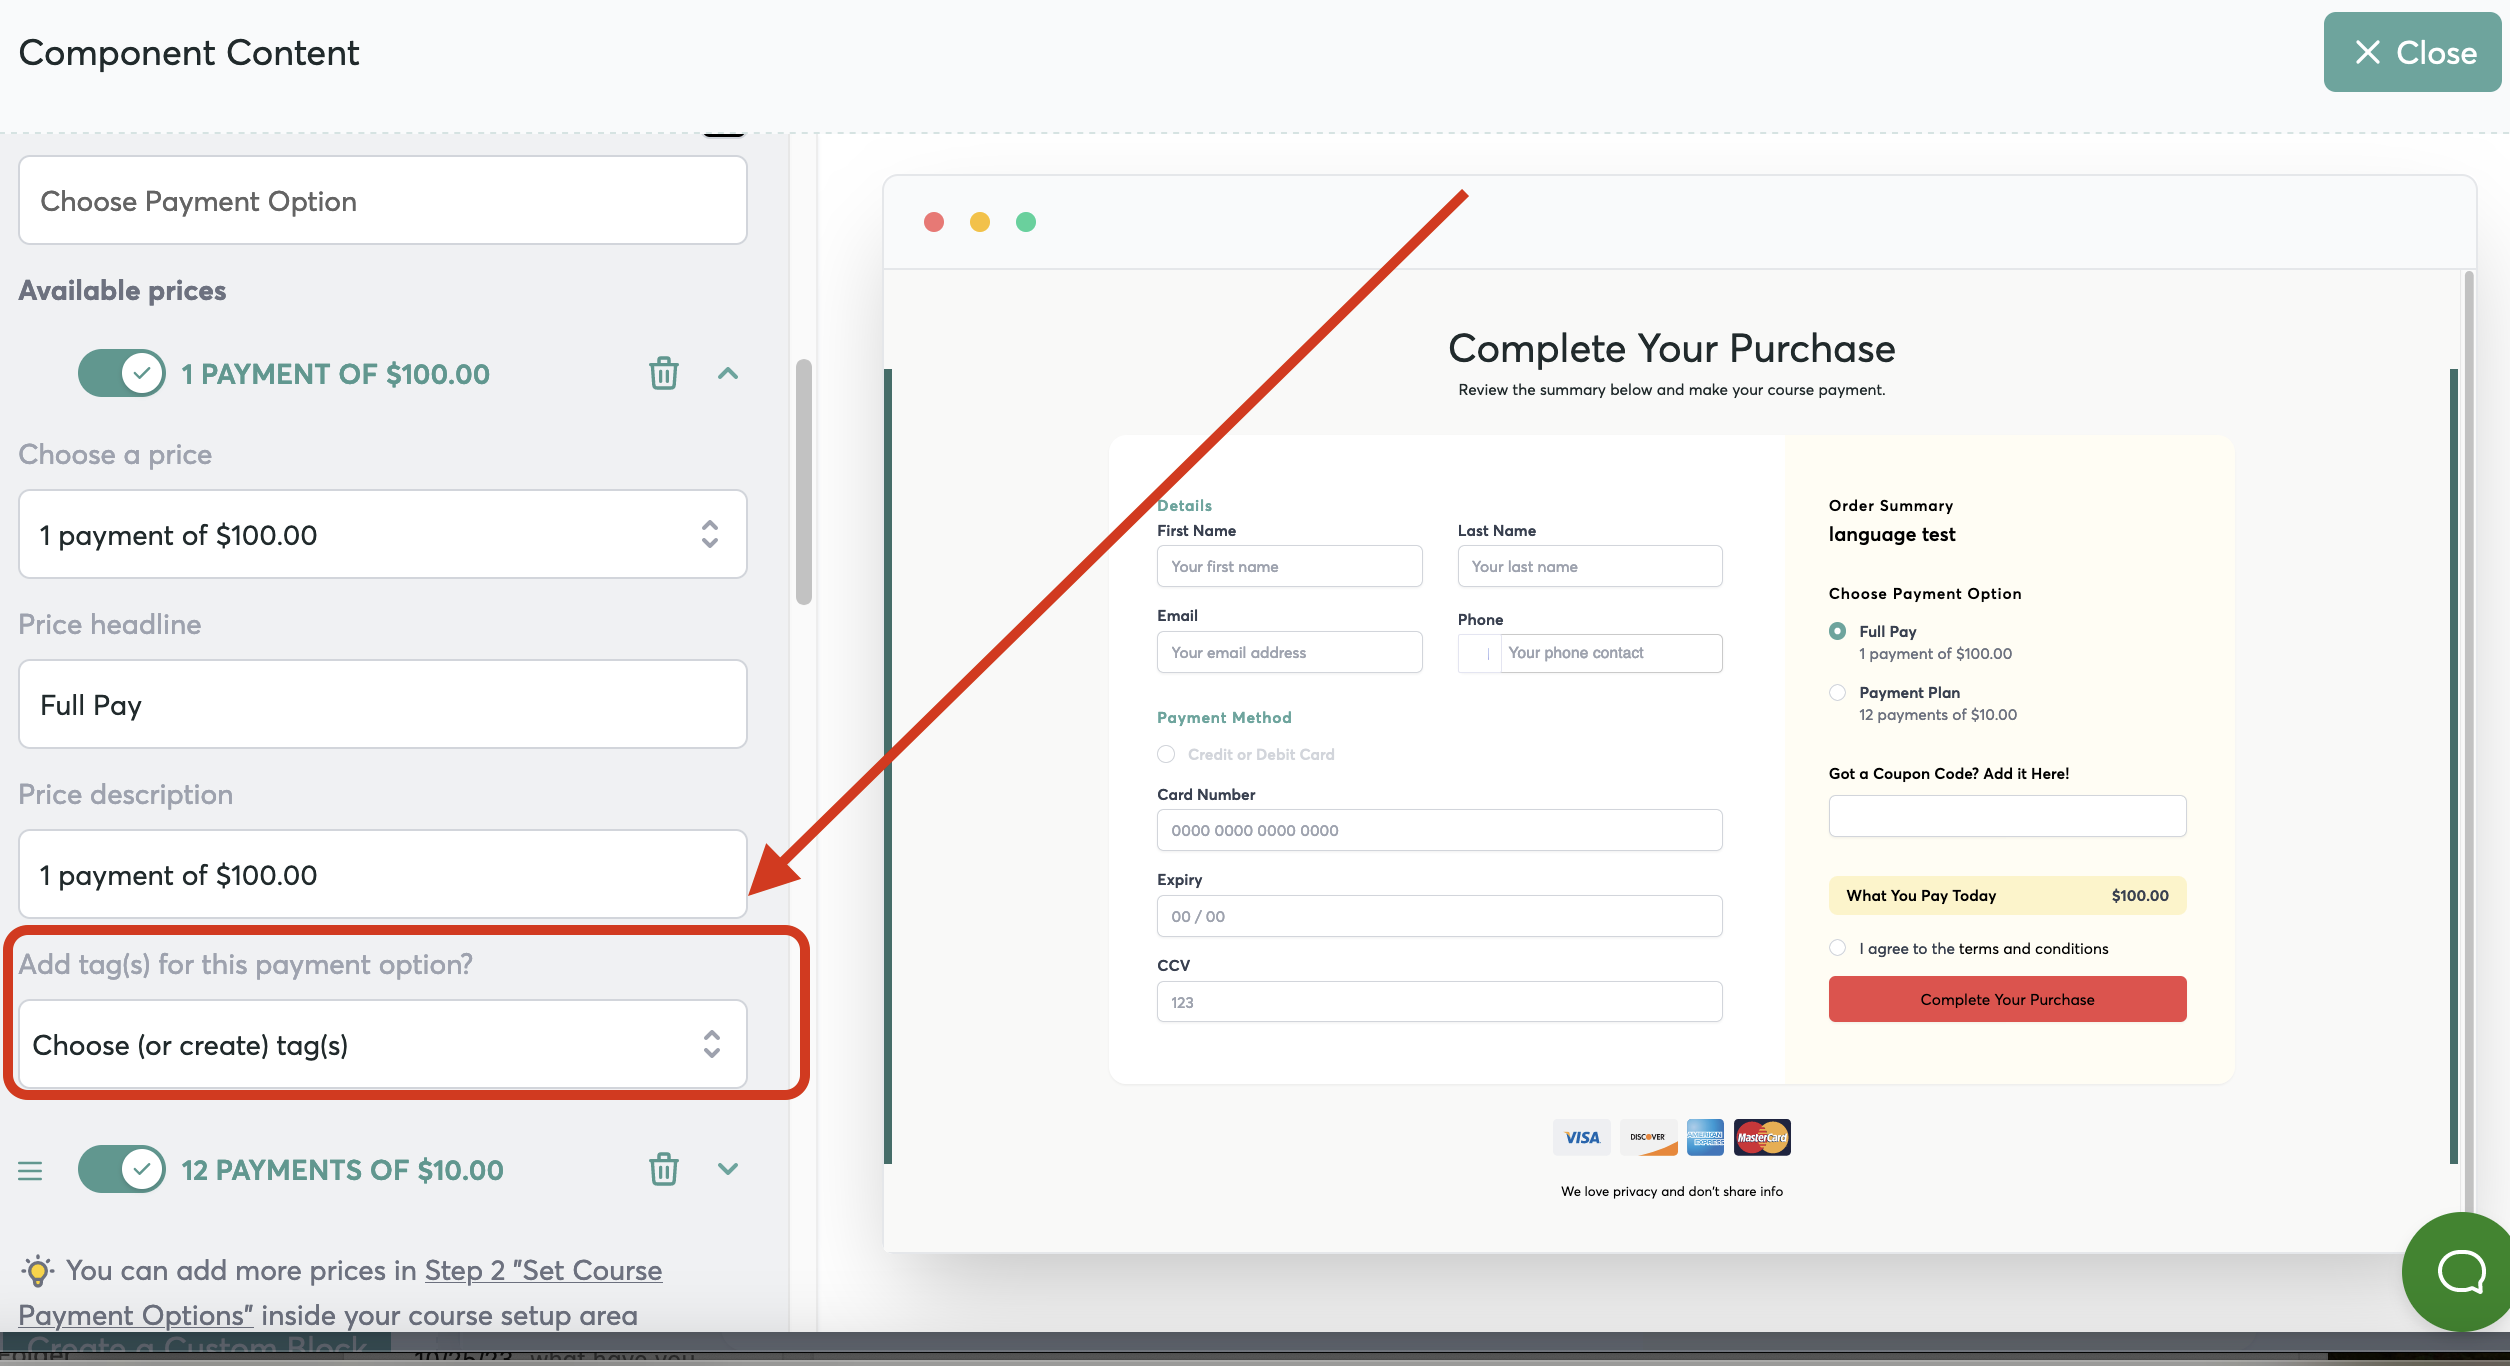
You can now choose to Show Content or Show a Navigation tab only to the students who have that particular tag.